Delete Selected Records
In this topic we’ll cover how to perform a bulk delete on a list of items, although the same process can be followed for customers, vendors, or fixed assets using the appropriate pages.
From the Item List page, select the records you wish to delete by selecting multiple records as shown in the following image.
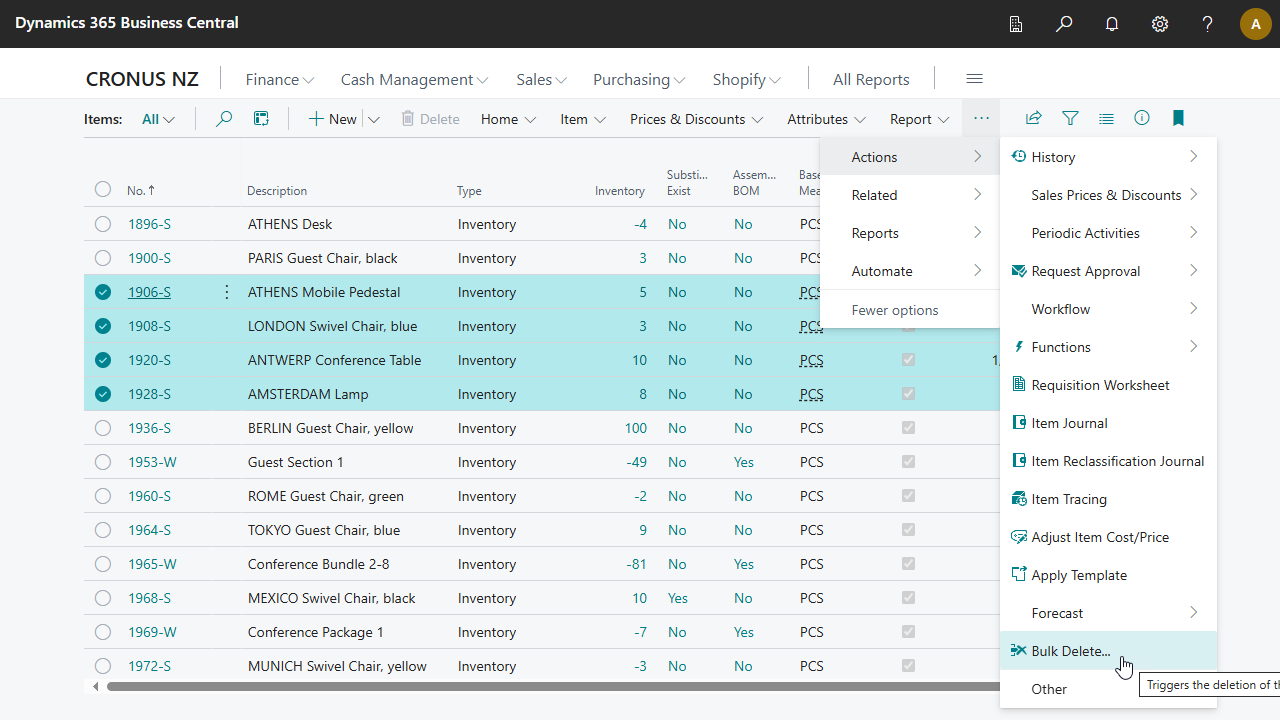
From the Actions, select the Bulk Delete option. The system will display a confirmation dialog to ensure you really want to delete the selected records.
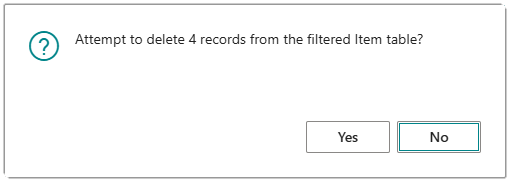
Select Yes to continue with the delete. The system will attempt to delete each record in turn and record whether the delete succeeded or failed. The dialog box will show the progress of the delete action and an estimated time to complete.
If any of the selected records failed to delete, you will see a dialog box asking if you would like to review the error messages for the failed delete attempts.
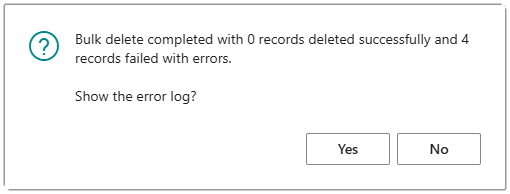
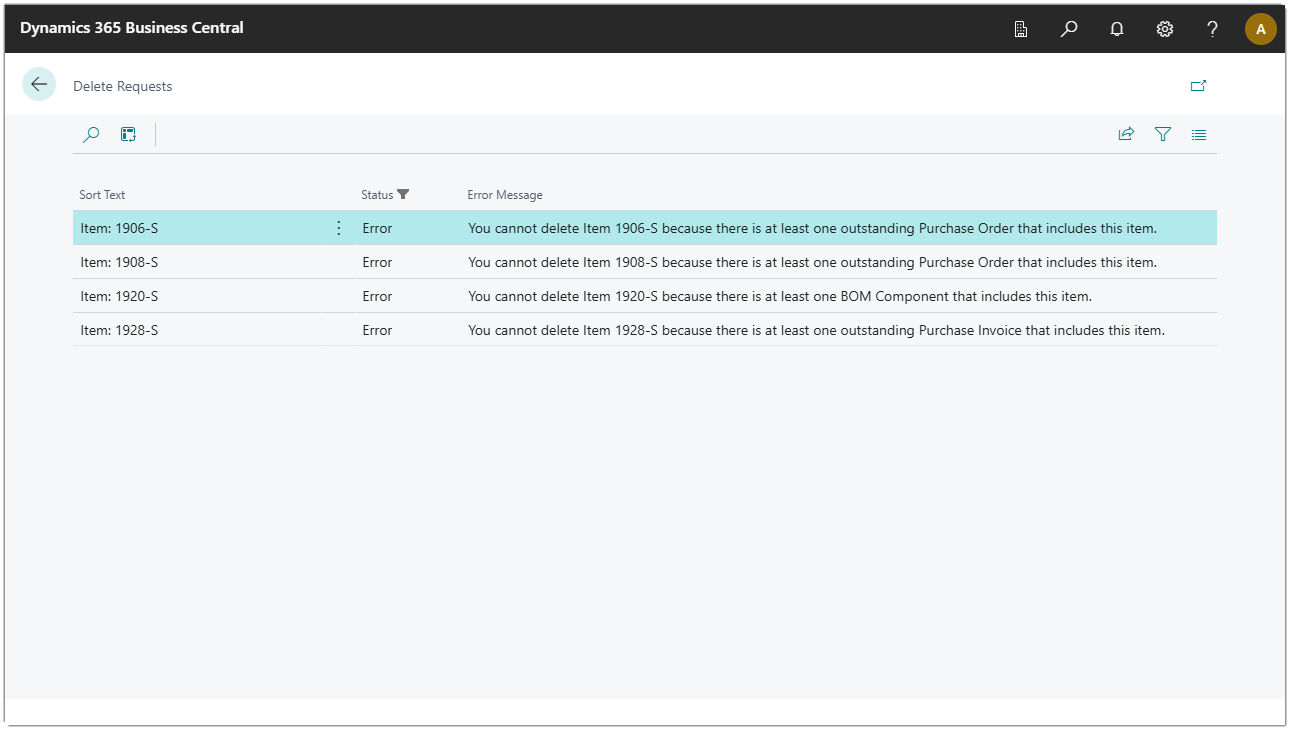
Select Yes to review the reasons why the records failed to delete.
Create a Delete Package
Delete Packages allow you to create a package and select multiple tables that will be deleted in the order in which they appear. If you have used an older version of Bulk Delete, Delete Packages replace Bulk Delete Requests and are the new method you should use for keeping your database under control.
Microsoft provide retention policies for keeping log data and other historical data under control and you should use retention policies if they are available. On those occasions where there are no retention policies for a table that may be part of a modification, you could go to your partner or developers and ask for a new retention policy to be created. The Delete Packages feature of Bulk Delete allows you to create similar functionality to retention packages but for any table in the system that you have access to delete from.
Open your Business Central environment and use the Alt+Q keypress or click the Search icon in the toolbar to bring up the search dialog which says Tell me what you want to do at the top of box. Type delete packages in the box and you will see an option for Delete Packages. Select the option to open the page and you should now be looking at the Delete Packages list page which shows all delete packages that have been created.
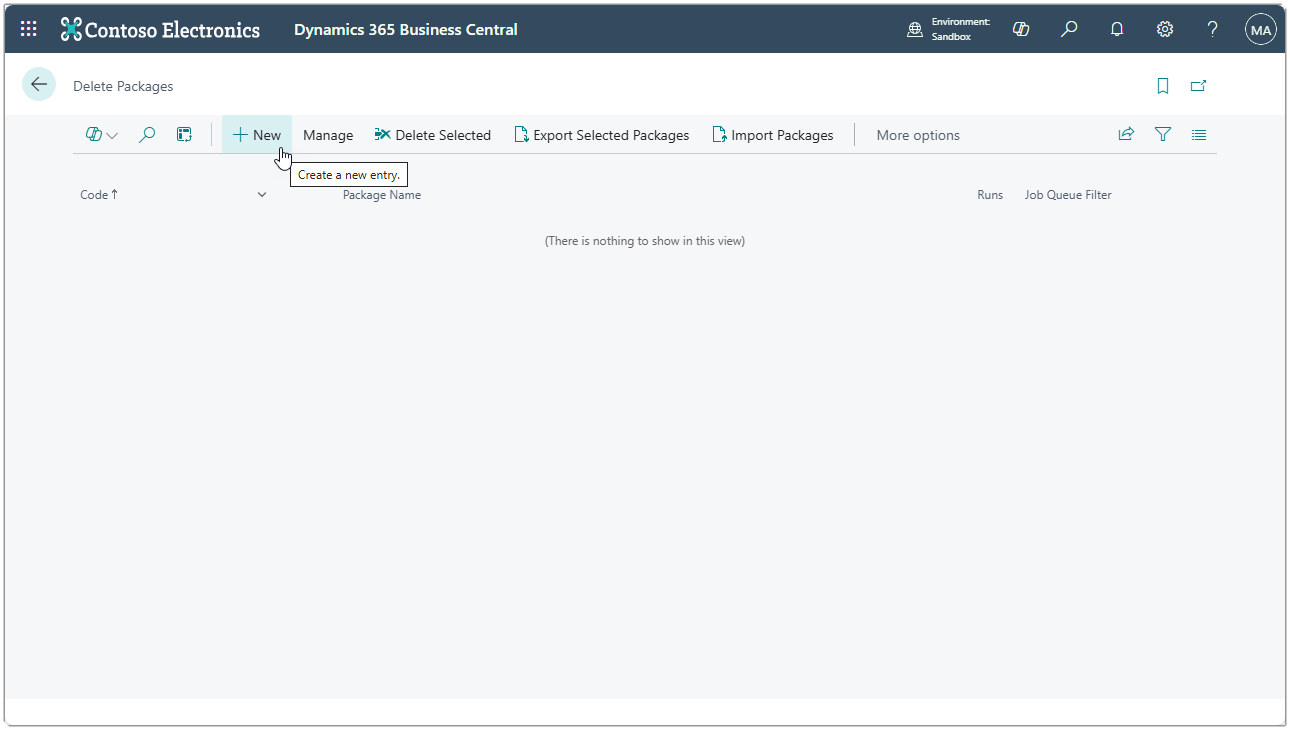
Select the option to create a new package.
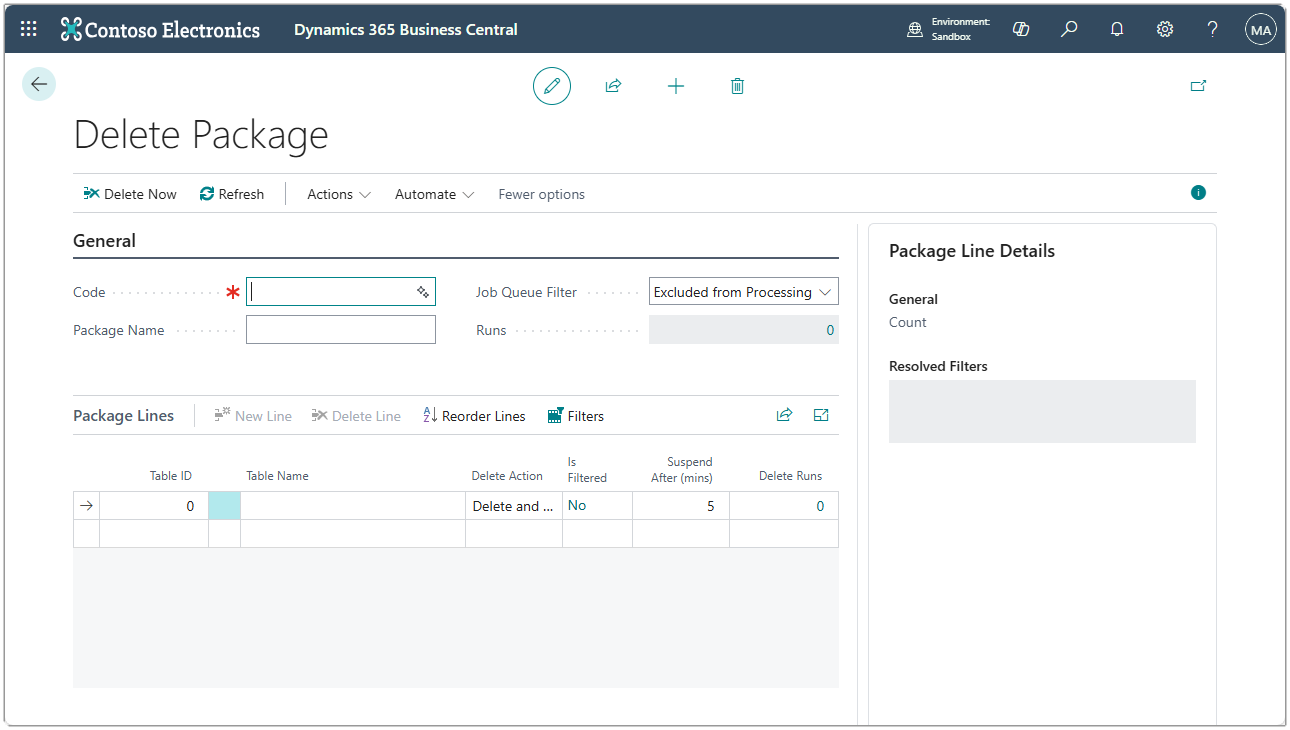
The system will create a new delete package and you must enter a value in the Code field to identify this new package. You can use anything to identify your delete package and you can use the longer Package Name field to provide a more meaningful description. Note that the Code value must be unique and delete packages are processed in the order of their code field if you are using background processing via the job queue. In our scenario, we’ll use the code TEST and a Package Name of My First Test.
The next field on the page is Job Queue Filter which you should leave set to Excluded from Processing for now. If you want this package to be picked up by the background process that can be configured to run via the job queue, you would change this setting to Available for Processing. The final field in the header section is the Runs which shows the number of historical delete package run records there are for this package. Every time a package is processed (either directly using the Delete Now option or via the job queue) a new Delete Package Run is created that shows the start and end time of the run, the count of logged messages (either deleted OK or failed to delete) and the number of lines associate with the run. You can drill down on this field to show the details. We haven’t run this package yet so there is nothing to show. Let’s add some lines to the package so we can test the process.
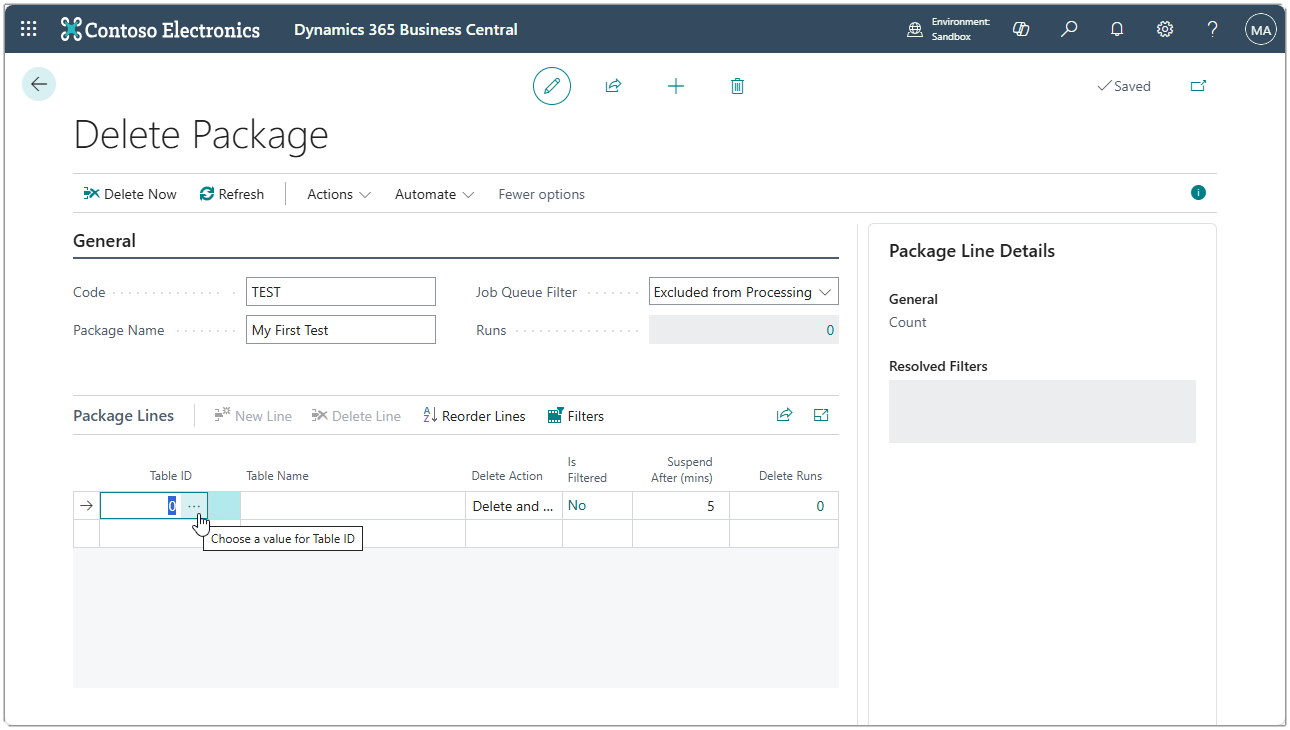
If you know the table id of the table you wish to delete from, you can simply type the value into the field and press Tab or Enter to move off the field. Once you update the table id, the Table Name field will be automatically populated. If you’re not sure of the table id, you can click the three dots to the right of the Table ID field to launch the object select page.
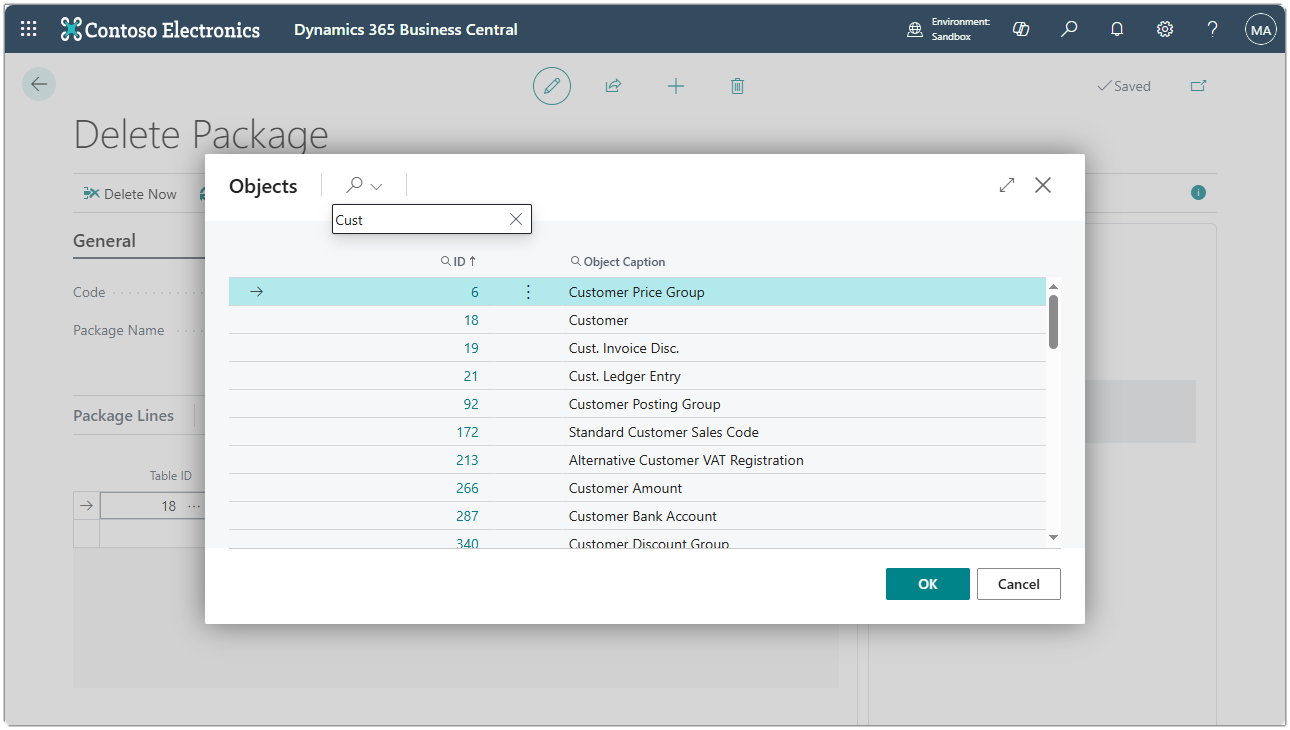
You can use the Search option to narrow the tables that are displayed. Select the table from the list and click OK to select it.
Set a Delete Action
The next field to populate is the Delete Action field which has the following possible values and meanings.
| Value | Meaning |
|---|---|
| Delete and Log | Each record that matches the filters will be deleted individually with the option to run the OnDelete table trigger set. This will ensure only records that you are allowed to delete are deleted. A log record will be written for successful and unsuccessful delete attempts which will allow you to review which records were deleted as well as check the error messages for those that failed to delete. |
| Delete Only | Same as the Delete and Log option, except successful delete attempts do not write log records. This means you cannot review which records were deleted but you can review error messages for those that failed to delete. |
| Truncate | The truncate option is extremely powerful. It runs very fast but will not execute any validation logic. This means you can delete records that the standard system validation would not allow you to delete normally. Due to the lack of validation, the truncate action can only be used in a Sandbox environment. If you try to run a delete package line using the truncate action in Production, you will see an error message in the run log stating that truncate is only available in a Sandbox. Note that not all tables allow the truncate command to be executed. This option is extremely useful for preparing a Sandbox environment that is a copy of Production but can be reduced in size quickly by truncating records from large tables. |
Set Filters
The next field on the line is called Is Filtered. This will show Yes if there are filters for this delete package line and No if there are none. You can either click the field drill-down link to bring up the Delete Package Line Filters page or click the Filters line action.
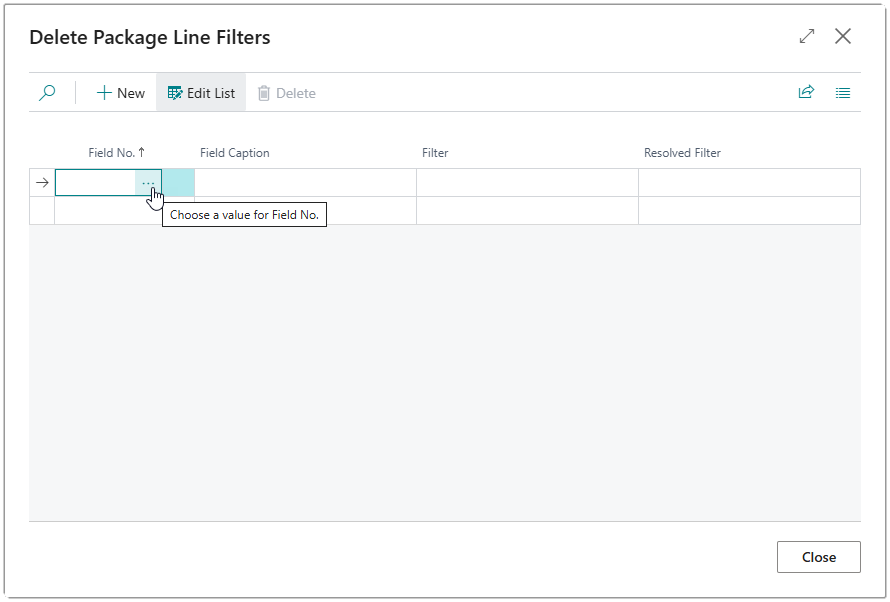
Use the three dots beside the Field No. field to bring up the Fields Lookup page or type the number of the field you wish to filter on. In our example where we are setting up a line for the customer table, select the No. field from the list or type 1 into the field.
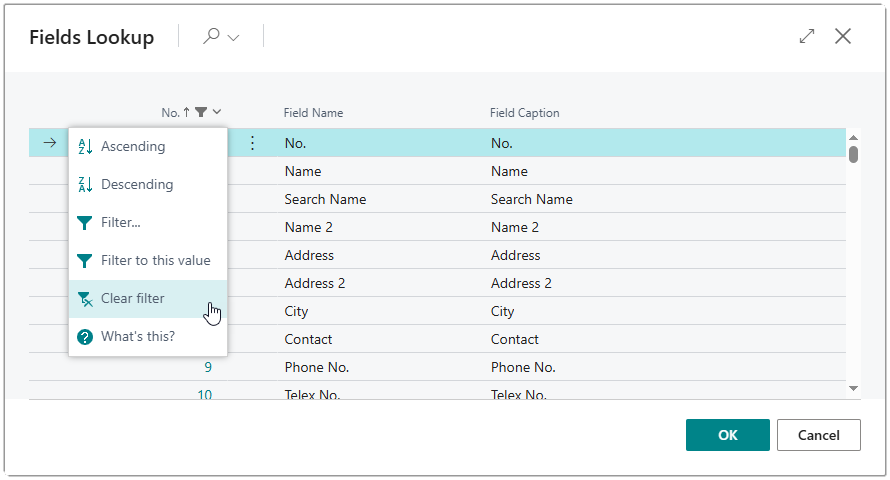
If the field you wish to select is one of the system fields (such as System ID, Created At, Created By), you can use the option on the field number to remove the filter that hides these fields by default.
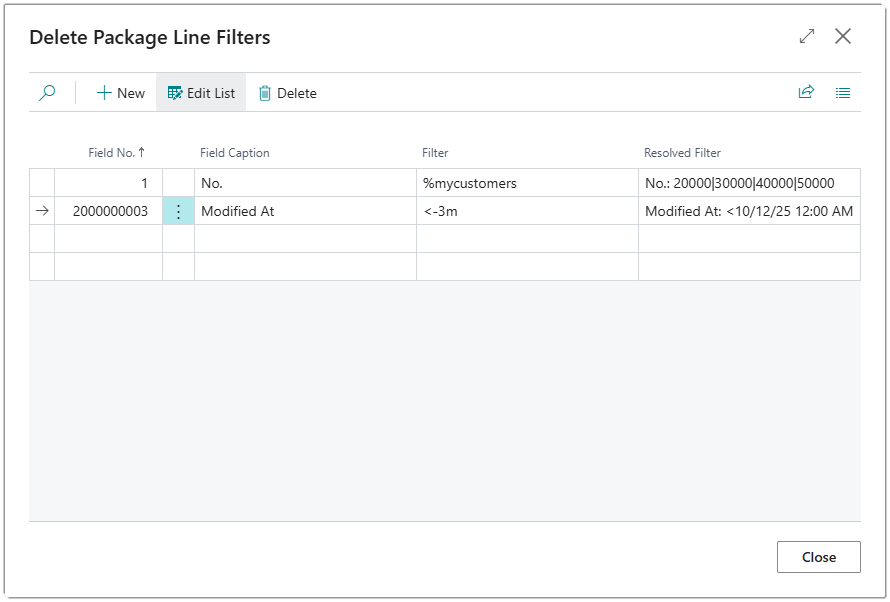
In the previous image we have used two special types of filters. The first uses %mycustomers placeholder to mean customers that have been added to your list of favourites. The second uses a dateformula <-3m to mean less than the date that is found by subtracting three months from the current date. Note that ordinarily dateformulae do not work with datetime fields such as Modified At, but Bulk Delete has been written to apply the filter to datetime fields correctly. When you enter placeholder tokens or formulae into the Filter field, the Resolved Filter will update to show how the filter is resolved using the current system situation. Note that this may resolve differently when the package is actually processed. Click the Close button to return to the Delete Package card page.
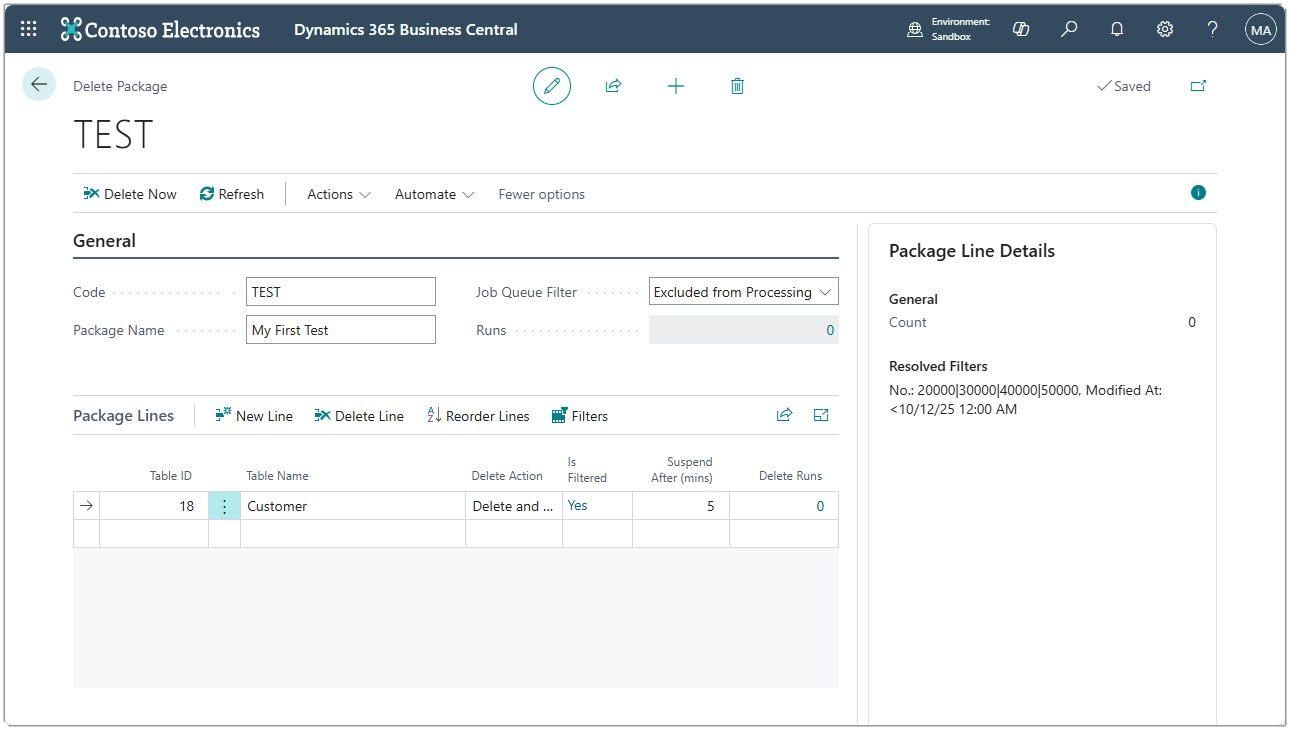
Notice that in the Package Line Details FactBox on the right you can see the total count of records that match the applied filters and the Resolved Filters for all fields that have filters applied.
The Count is actually calculated using a page background task, so it can sometimes take a few seconds to update if you’re dealing with many millions of records. The count is also dynamic because it can use filters which have formulae and tokens. If you want to calculate the count again, you can click the Refresh button in the action bar.
Set the Timeout
The next field on the delete package line is the Suspend After (mins) field. This field will default to 5 for every new line, but can be edited to any value that is greater than or equal to zero. This allows you to control how much time the system should spend processing a delete package line before it goes on to the next line. If a delete package line is still being processed when the duration reaches the suspend after value, the run will be suspended and an appropriate status will be set. The records that were deleted prior to suspension will remain deleted. If you use the value zero in the Suspend After (mins) field, the package line will be skipped without processing any deletes. This is a useful way to temporarily “remove” lines from a package.
Add More Lines
You can repeat the above process to add new lines to an existing package. When you have multiple package lines, they will be processed in the order that they appear on the page. You can reorder lines by using the Reorder Lines action.
Keep Your Database Tidy
When a delete package is processed it will create log records which are essential for determining what happened but are not something you want to keep around for a long time. When you create a new package, it’s a good idea to add a package line that will delete old log records for the package. There is an option to do this for you automatically.
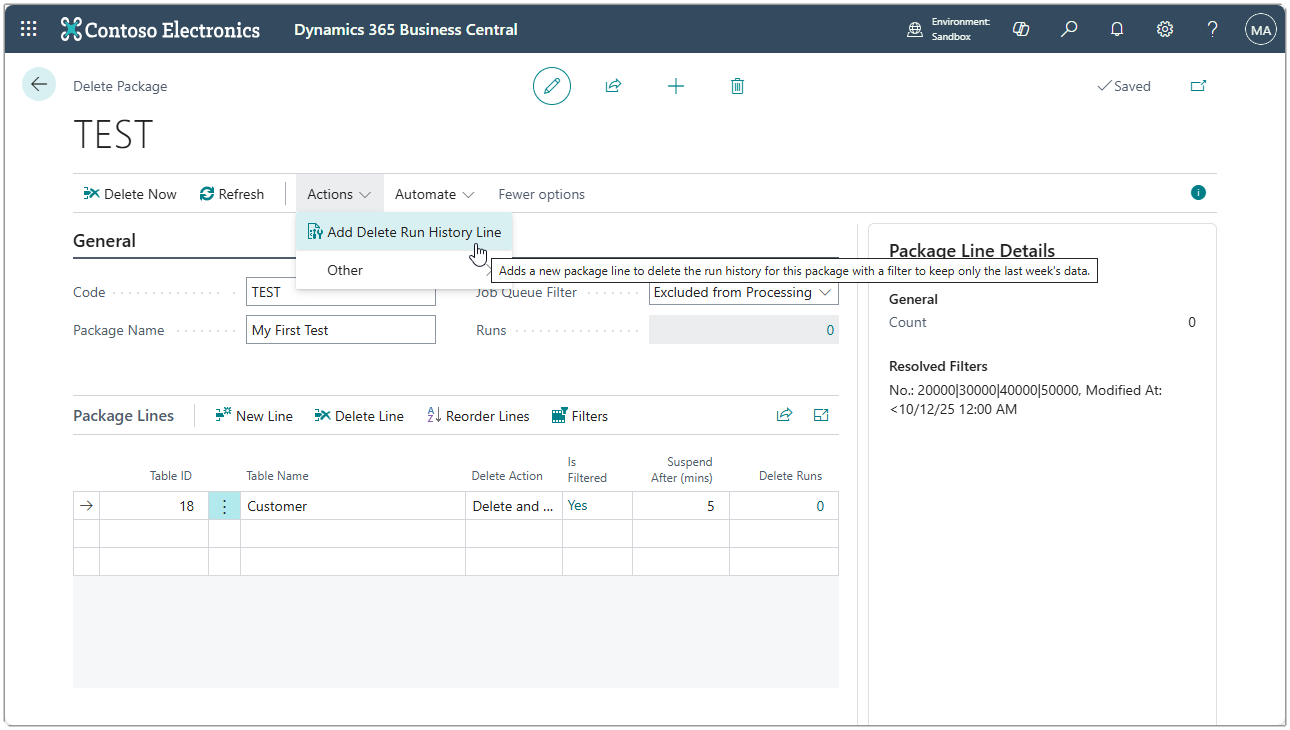
Once this action is selected, it wil add a new line to your package with the following properties.
- Table ID: 71922934
- Table Name: BC_DeletePackageRun
- Delete Action: Delete Only
- Is Filtered: Yes
- Suspend After (mins): 5
and the following filter lines.
- Field No.: 1
- Field Caption: Package Code
-
Filter: TEST (actually whichever code you are using for your package)
- Field No.: 6
- Field Caption: Started At
- Filter: <-1W
This will mean that whenever this package is processed, the final action will be to delete old Delete Package Runs for this package code that were started more than a week ago.
There is nothing special about this package line other than the fact you have an action that will insert it for you. You can edit the time frame or other filters like any other package line.
Reorder Lines
When you have a delete package with multiple lines, you can change the order of the lines which will change the order in which they are processed.
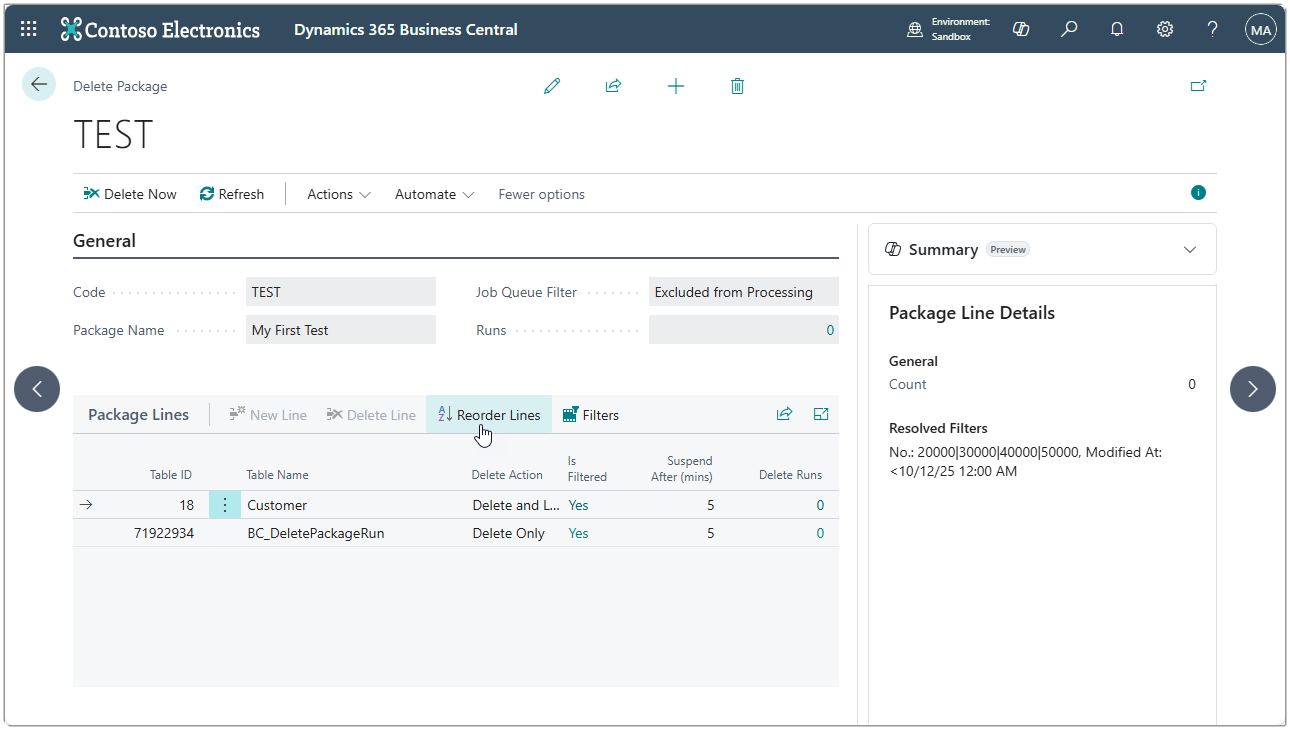
Select the Reorder Lines action.
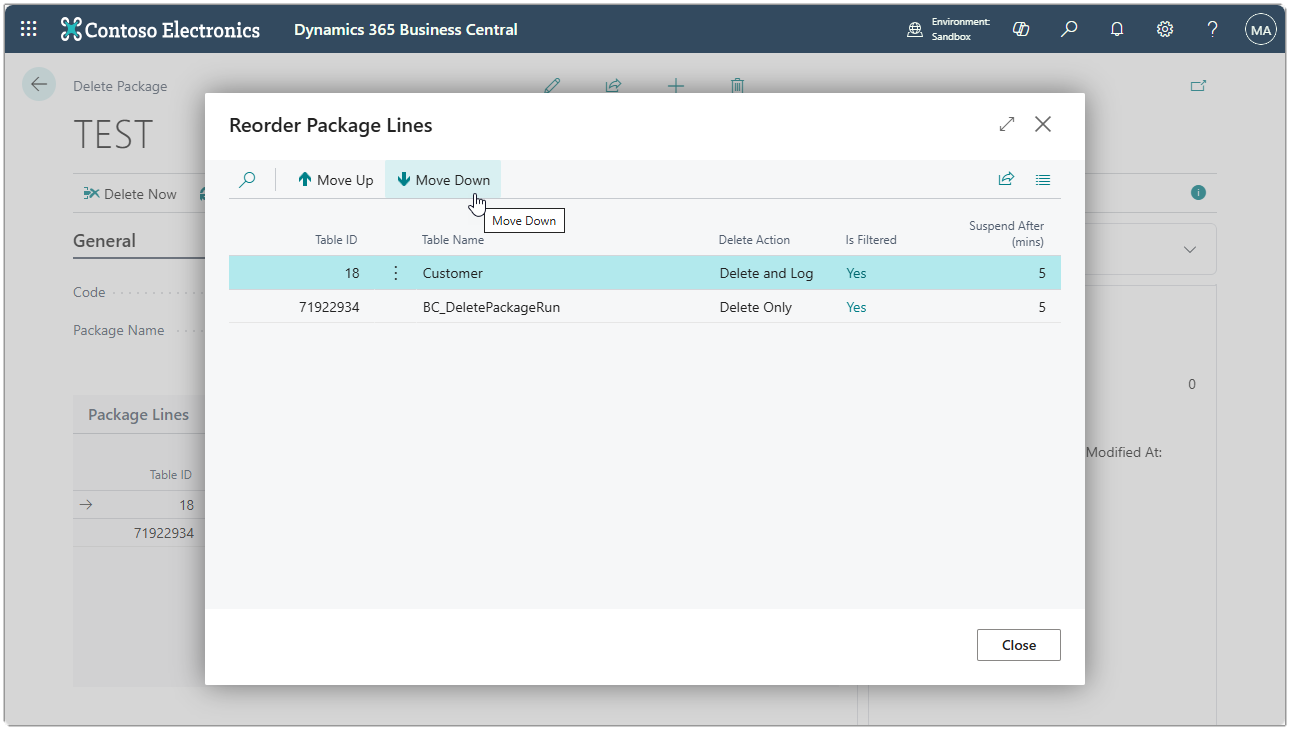
Once the order of the lines on the Reorder Package Lines page is as you want it to be, click the close button to return to the Delete Package card.
Process a Package
When you are ready to process a package, simply click the Delete Now action on the delete package card. The system will prompt to confirm that you want to continue with the delete but will not show any progress indicator or completion message.
Once the process has completed, the number of Runs will be increased for the package and you can use the drill-down to review the start and end times. The Delete Runs field for each of the lines will also be increased and you can drill down on this field to see more details including the number of records deleted OK and failed to delete along with a running duration and average processing rate of records per minute.
Background Processing via the Job Queue
To process delete packages via the job queue, create a job queue entry for Codeunit 71922936 BC_ProcessAvailablePackages. This will find any delete packages with a Job Queue Filter field set to Available for Processing and process the package in the background.
One single job queue entry will process all available packages, however you can use the Parameter String field on the job queue entry to provide additional filters that will be applied to the delete package code.
Export and Import Packages
One common scenario for delete packages is to use a delete package to reduce the amount of data stored in a Sandbox environment. Is it common to want to keep all configuration settings the same in your Sandbox environment as the Production environment but you do not need all of your historical data. A delete package will allow you to quickly delete or even truncate tables that are taking up a lot of database space.
If you overwrite your Sandbox with a fresh copy of Production, you may find your delete package for keeping your environment small is lost as this did not exist in your Production environment.
To deal with this, we have created options to export and import package definitions. First run the Delete Packages page.
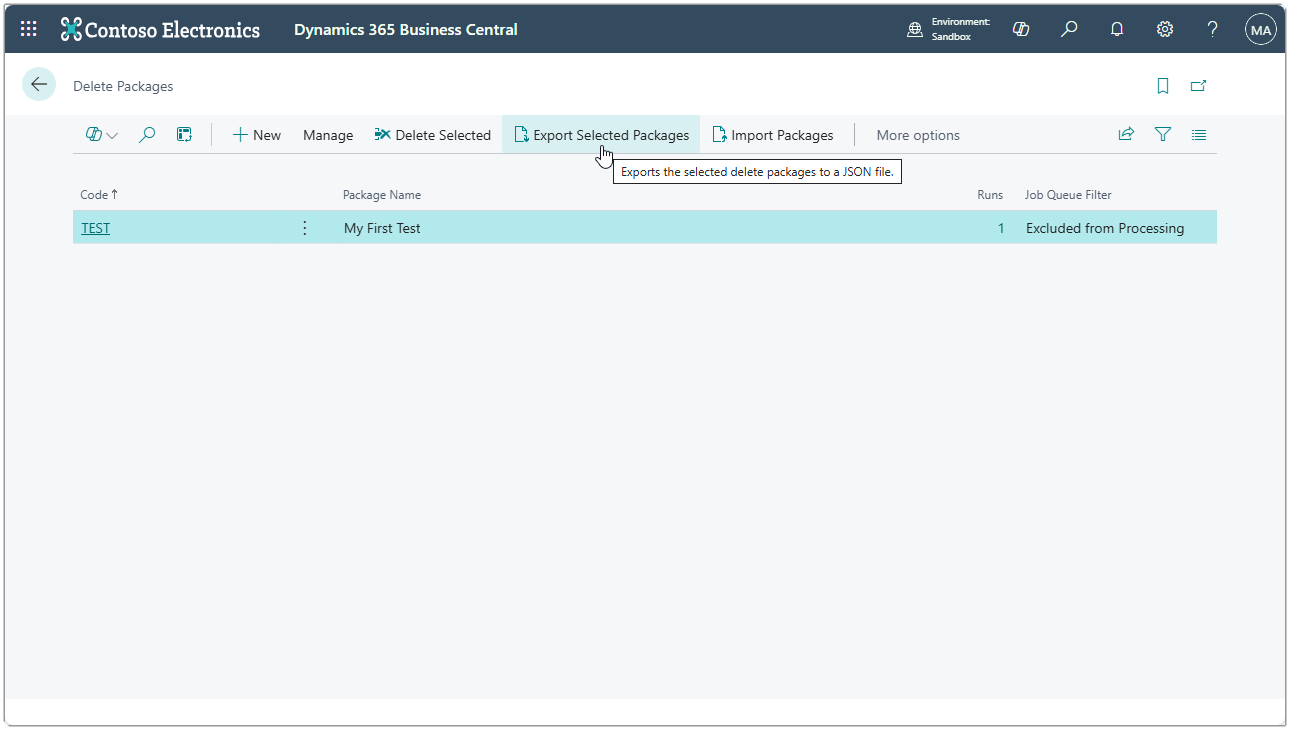
The selected packages will be written to an export file using the JSON format. This means you can review the file and edit it if you wish as JSON is a structured text format.
The Import Packages action will use the exported packages and bring them into the system. If any of the packages in the file already exist in the database, you will be asked to confirm you would like to overwrite the definitions.
Deleting From Restricted Tables
There are certain tables in Business Central that can not (and should not) be deleted from, except via the built in data archive routines. For example General Ledger Entries, Customer Ledger Entries, Vendor Ledger Entries, Item Ledger Entries. These tables can become very large over time and you may want to keep only the last month’s worth of data.
When deleting from a Sandbox special permissions have been added to allow these restricted tables to be deleted from using the regular one-by-one record deletion and the fast truncate option. Note that if you attempt to delete from the same tables in Production, you will get an error telling you your license does not allow deletion from the table specified.
For Developers
If you want to add the Bulk Delete action to your own extensions, you can simply add the Bulk Delete app as a dependency to your project as follows.
    {
      "id": "f6ed7976-9eb2-4854-b0e3-ab8a4a3f23ea",
      "name": "Bulk Delete",
      "publisher": "BC Apps Limited",
      "version": "2.0.26.0"
    }
Then on the list page, simply add the following action. Please note that this is for deleting Customer records from the Customer List page. You should replace the BC_BulkDelete with your own action name that uses your own prefix, you should change the CustomerToDelete variable declaration and name to refer to the record you are actually deleting. The option will use the multi-select as the required records to delete.
    actions
    {
        addlast(processing)
        {
            action(BC_BulkDelete)
            {
                Caption = 'Bulk Delete';
                Ellipsis = true;
                ToolTip = 'Triggers the deletion of the selected records.';
                Image = DeleteRow;
                ApplicationArea = All;

                trigger OnAction()
                var
                    CustomerToDelete: Record Customer;
                    ProcessSelection: Codeunit BC_ProcessSelection;
                begin
                    CurrPage.SetSelectionFilter(CustomerToDelete);
                    ProcessSelection.DeleteSelectedRecords(CustomerToDelete);
                end;
            }
        }
    }