Installation
Install Without a License
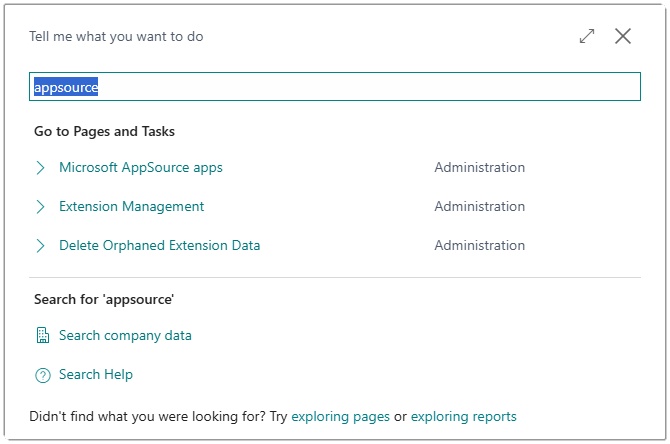
Open your Business Central Sandbox environment and use the Alt+Q keypress or click the Search icon in the toolbar to bring up the search dialog which says Tell me what you want to do at the top of box. Type appsource in the box and you will see an option for Microsoft AppSource apps.
Select the option to launch the Microsoft AppSource apps page. This page can take a while to load as it needs to read a list of available apps from the AppSource API. If you have not used this page before, you may see a prompt asking you to allow a connection to an external service.
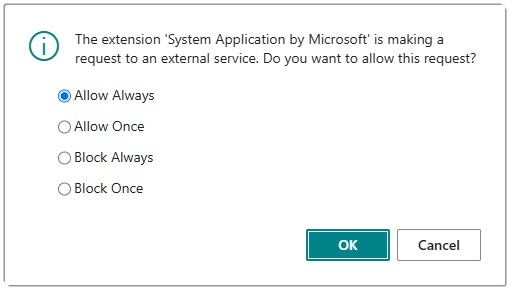
Ensure Allow Always is selected and click OK.
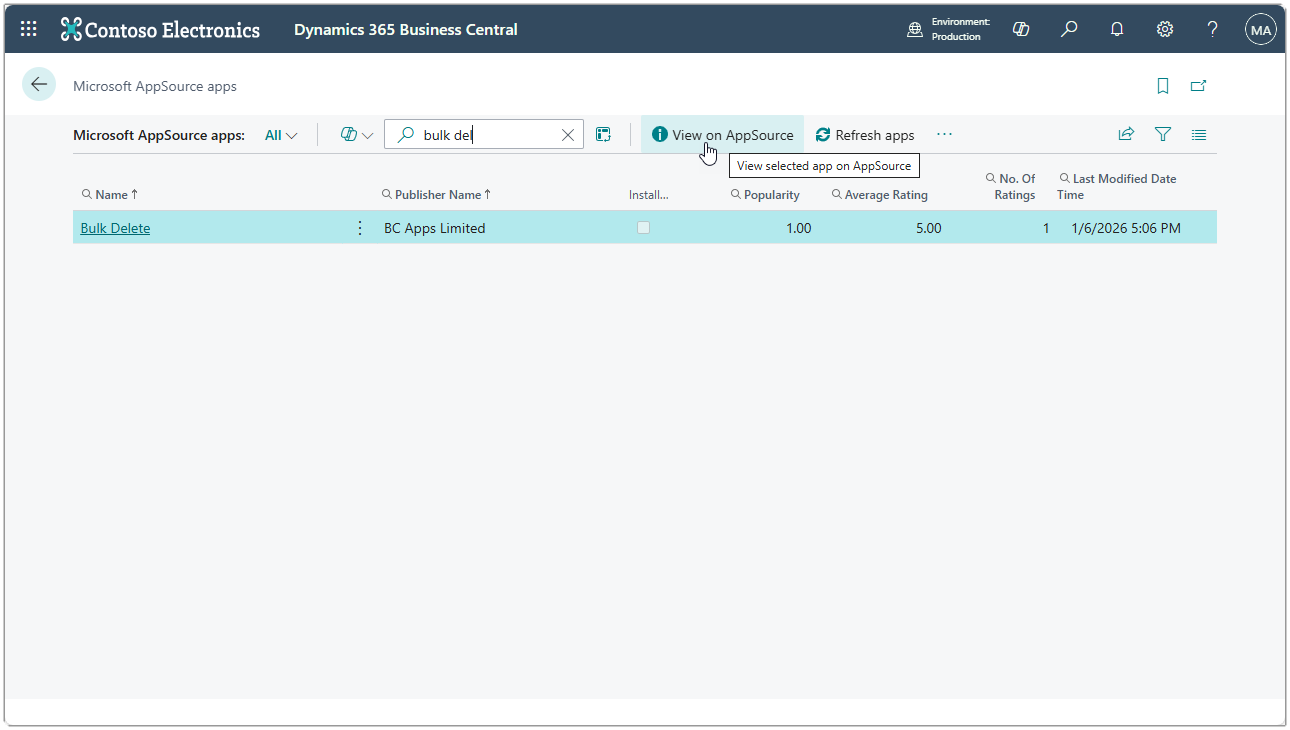
When the Microsoft AppSource apps page has opened, use the search box at the top of the page to search for a specific app.

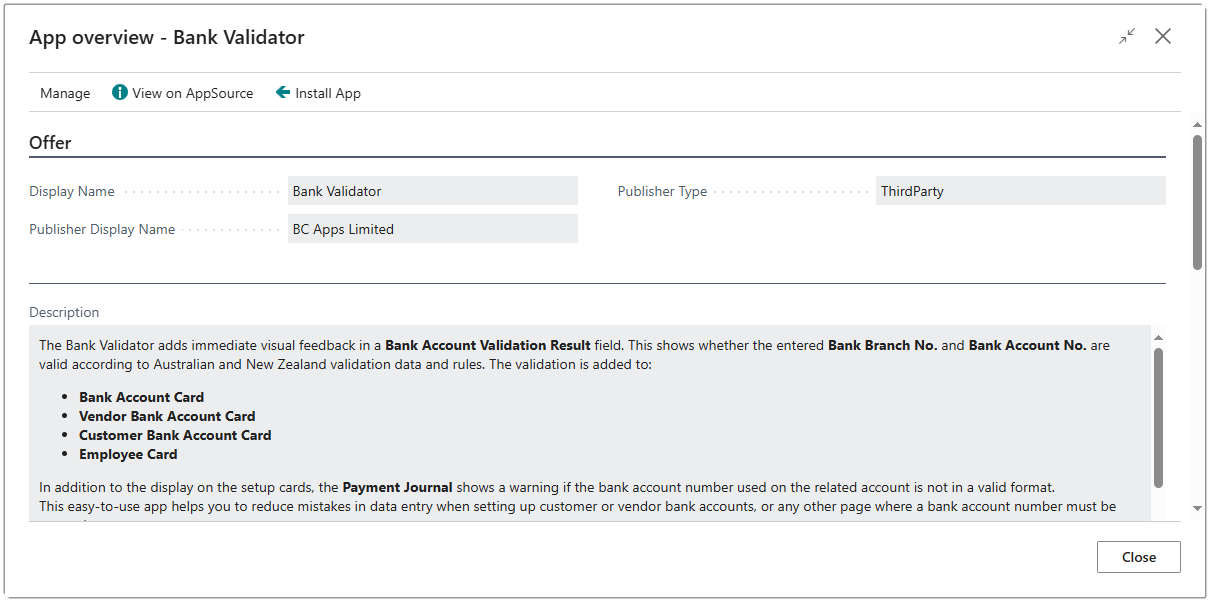
Type Bulk Delete into the search box and you will see the app from publisher BC Apps Limited in the list of results.
Click on the contents of the Name field for the Bulk Delete app and you will be shown the App overview page.
Click the Install App action button at the top of the page.
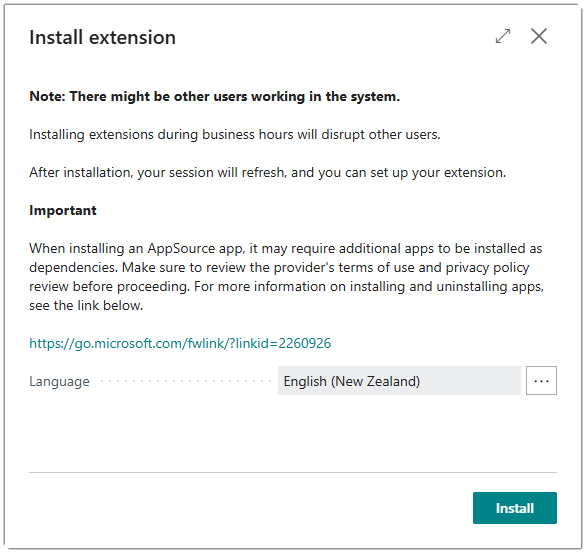
Click the Install button at the bottom of the dialog to continue with the install.
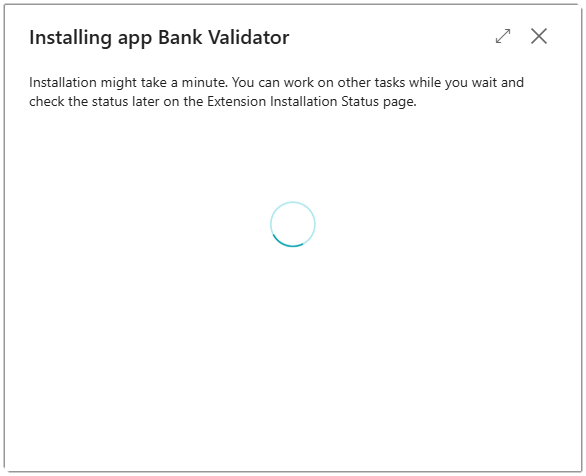
The Installing app dialog will launch to show you that the app installation is in progress.
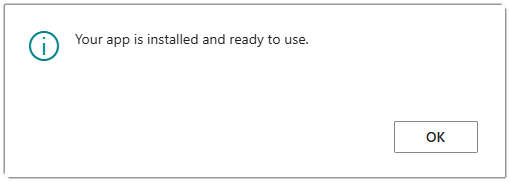
After a short while, you will see the message that your app is installed and ready to use.
Congratulations! The app is now installed in your environment and you can go ahead and configure the extension for the first time use.
Install With a License
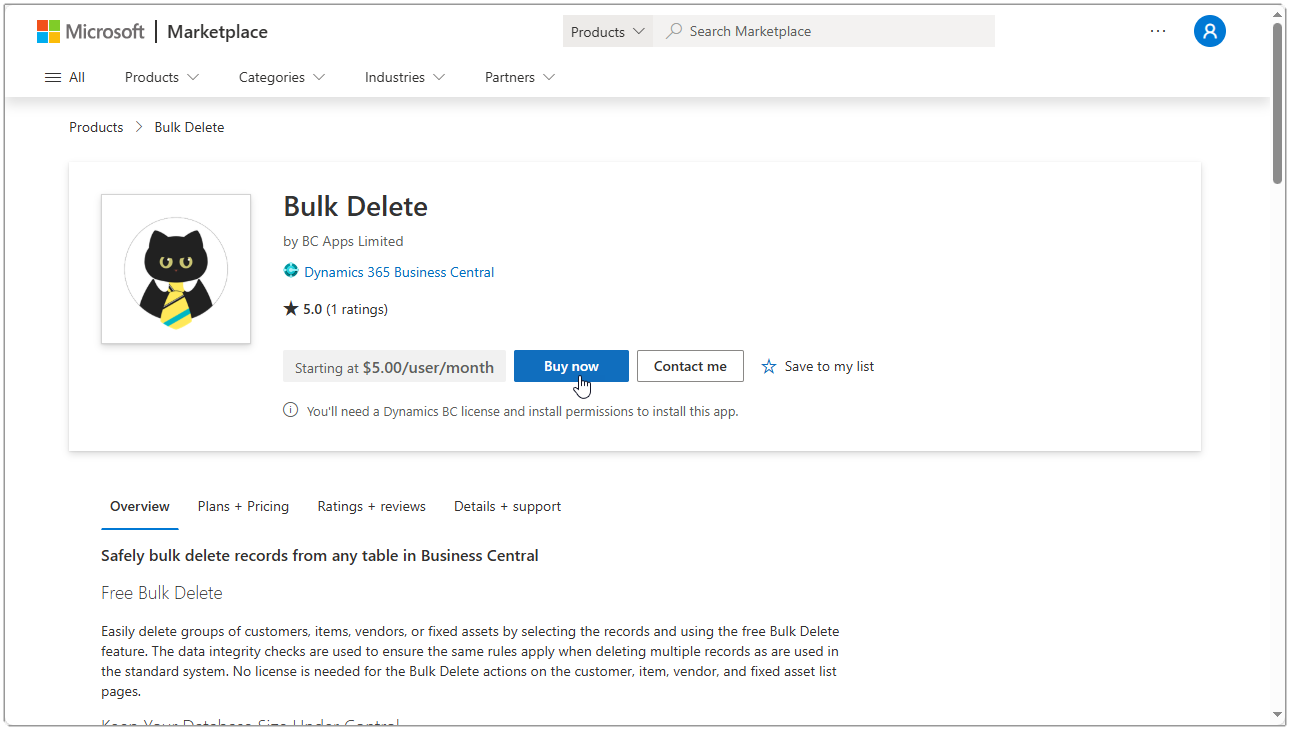
You can install this app from the Bulk Delete page on AppSource by clicking the Buy now button. This can only be used to install the app in your organisation’s tenancy and is the only way to purchase a license for the first time.
You can also get to the AppSource page for this app by following these steps:
Open your Business Central environment and use the Alt+Q keypress or click the Search icon in the toolbar to bring up the search dialog which says Tell me what you want to do at the top of box. Type appsource in the box and you will see an option for Microsoft AppSource apps.
Select the option to launch the Microsoft AppSource apps page.
When the Microsoft AppSource apps page has opened, use the search box at the top of the page to search for a specific app.
Type Bulk Delete into the search box and you will see the app from publisher BC Apps Limited in the list of results.
With the line for the Bulk Delete app selected, click on the View on AppSource action.
If your billing country does not match your saved payment method, you may see a message telling you there is a billing country mismatch.
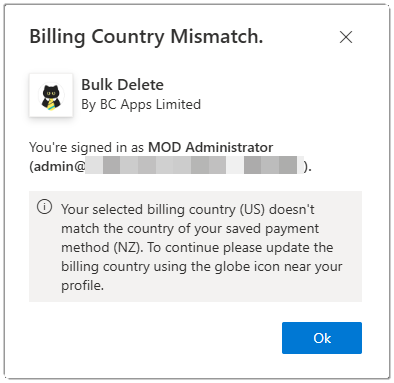
If this message appears, you can use the following topic to resolve the billing country mismatch, otherwise continue from the Buy now section.
Resolve Billing Country Mismatch
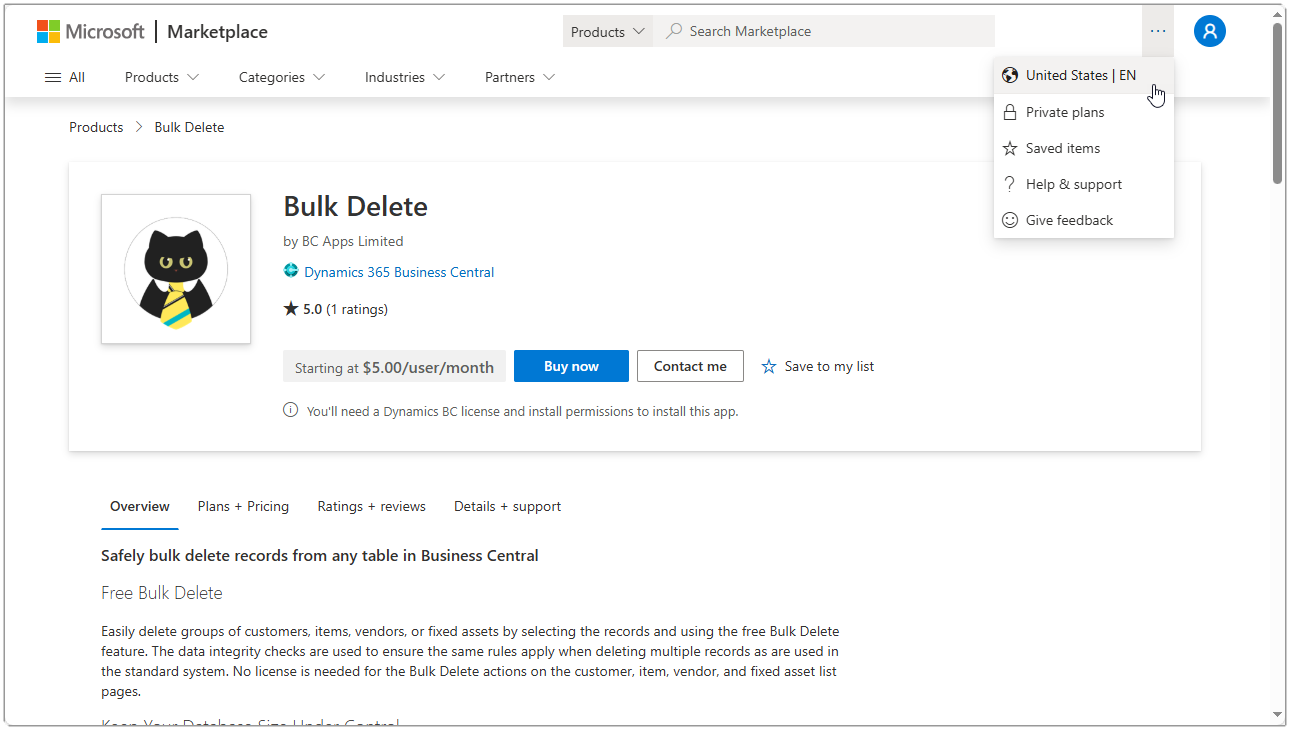
You should check that your region in AppSource is set correctly to match your region. Click the three dots at the top of the screen and select the option that shows your current billing region.
Use the drop-down options to set the billing country and language to match your preferred settings. Note that this app is only available in English but is available in all supported countries.
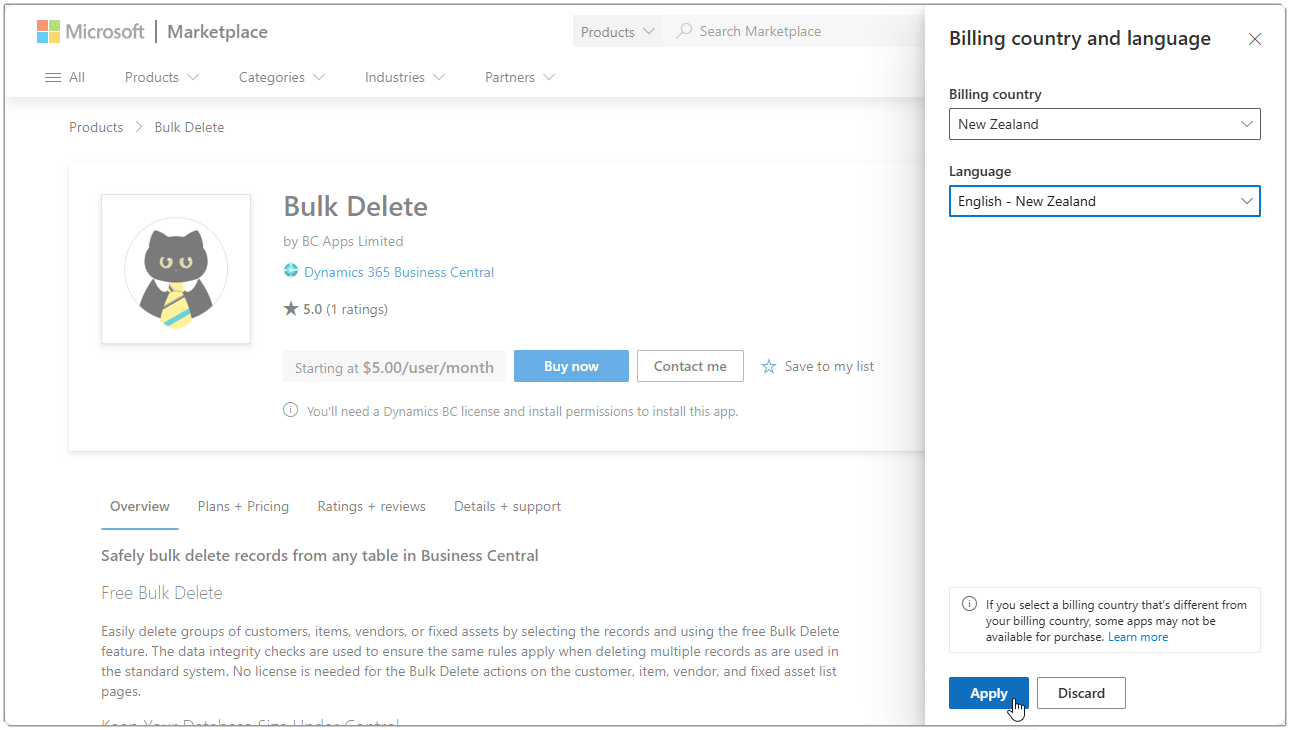
Once you have set your settings you can click the Apply button. This action only needs to be done the first time you purchase an app from AppSource.
Buy now
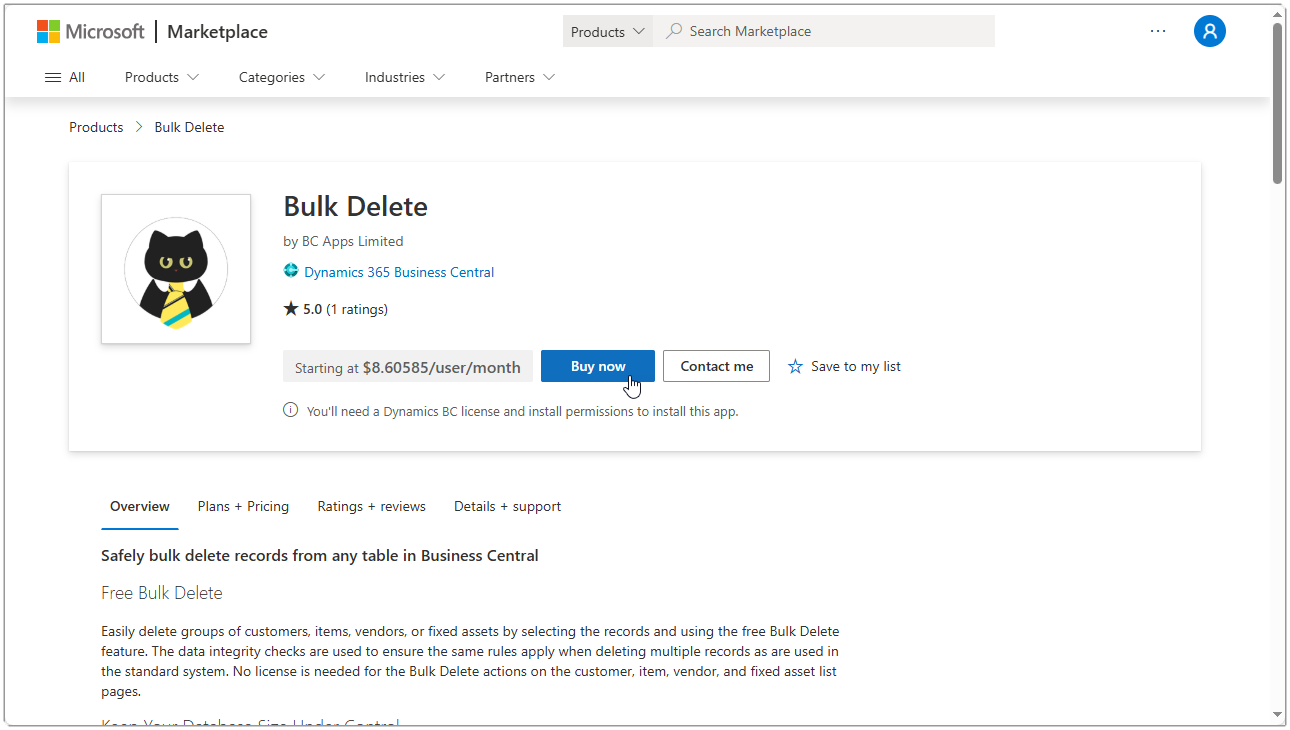
You may notice that the price displayed for the app is an unusual amount with more than two decimal places. This is because the price of the app is set in USD and all other currency prices are calculated by AppSource.
Due to the nature of this application, it is likely you will only need a single license as you will only have one user that is allowed to process a delete package. Click the Buy Now button to continue.
The first stage of the checkout process requires you to select a plan.
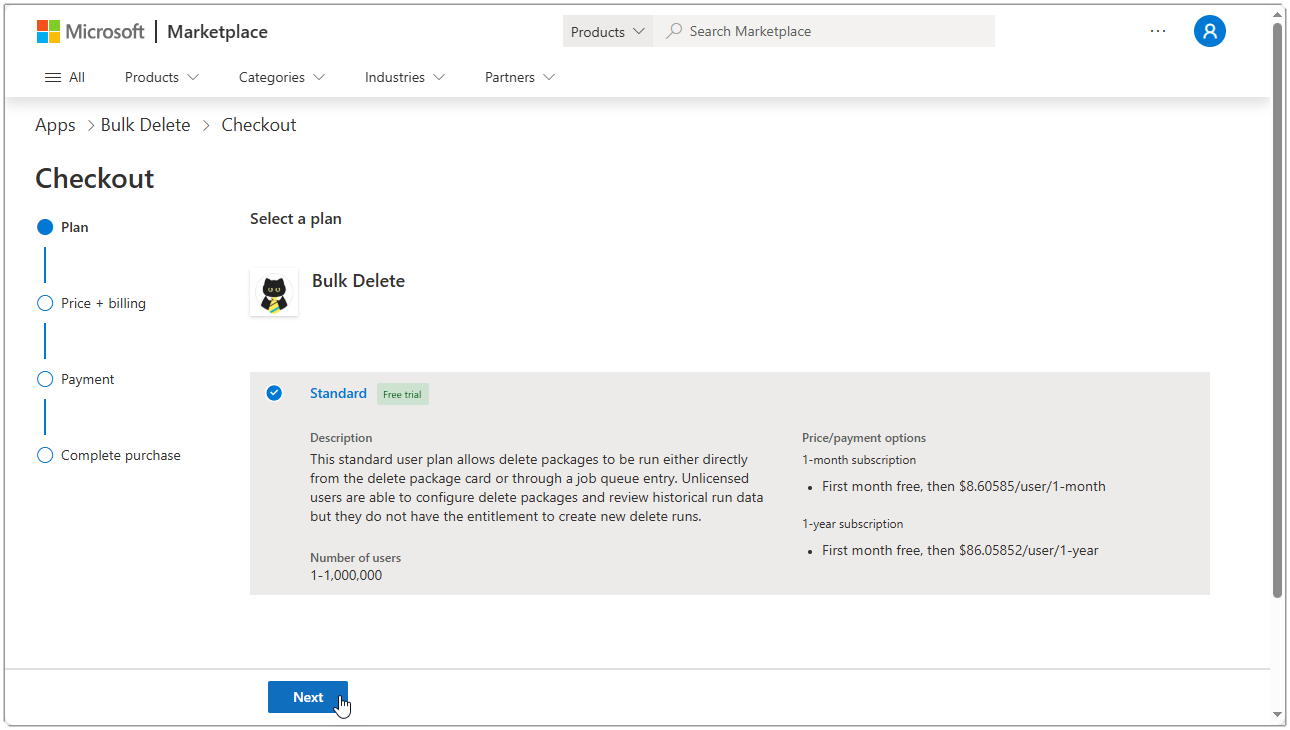
There is only one plan to select from so click the Next button to continue.
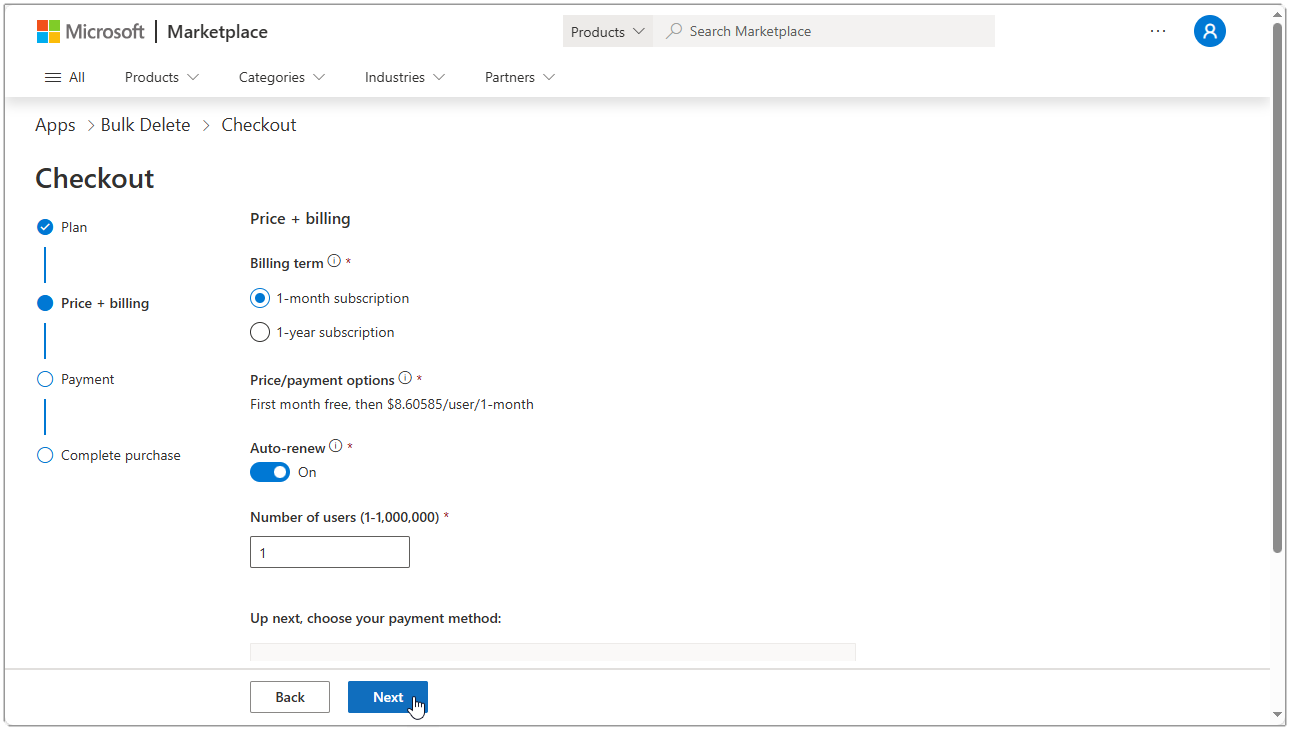
Select the number of licenses you want to purchase, if you intend to use the 30-day free trial and not continue after the free trial period, you should select the Billing term as 1-month and ensure Auto-renew is off. Click the Next button to get to the payment method selection. You must enter a valid payment method, even if you are only going to use the free trial. If you select a 1-month term with no auto-renew, you will not be charged.
If you have already configured a payment method, you can select the existing billing profile, otherwise select the Add new option and follow the prompts. We are not going to cover setting up a billing profile in this topic.
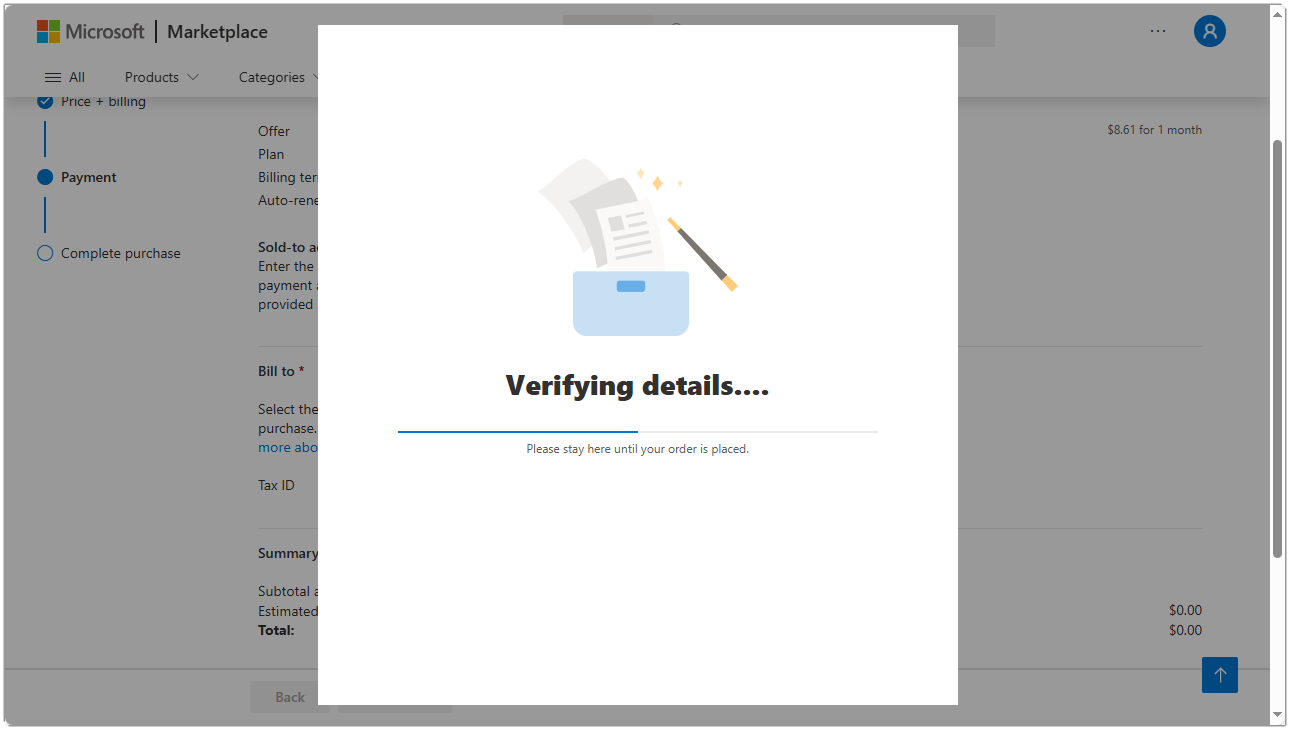
Scroll down to see the totals of your order and terms and conditions and when you are satisfied, click Place order.
You will see some progress indicators showing that the order is being processed.
After a short while you should see the order completion screen.
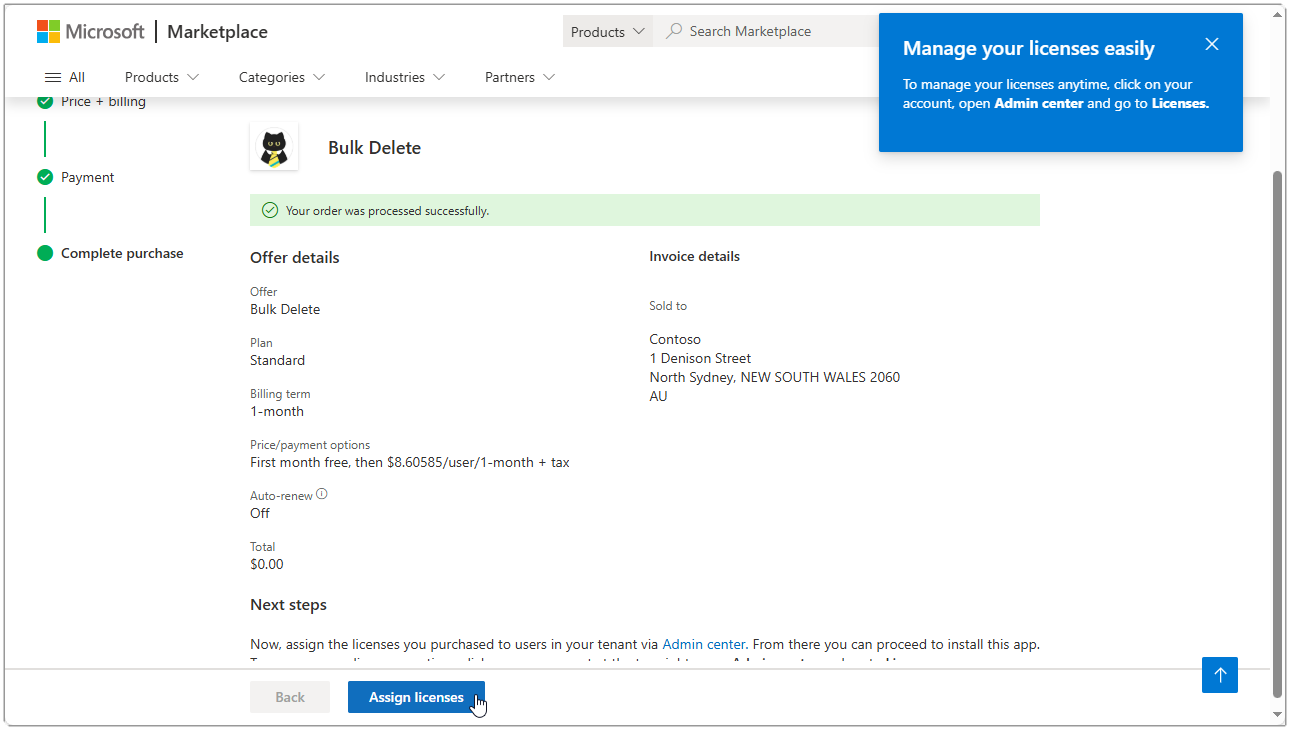
You will now be redirected to the Microsoft 365 admin center on the Licenses section. You may not have sufficient rights to assign licenses to users within your organisation. If this is the case, you should seek help from your internal IT support or your partner.
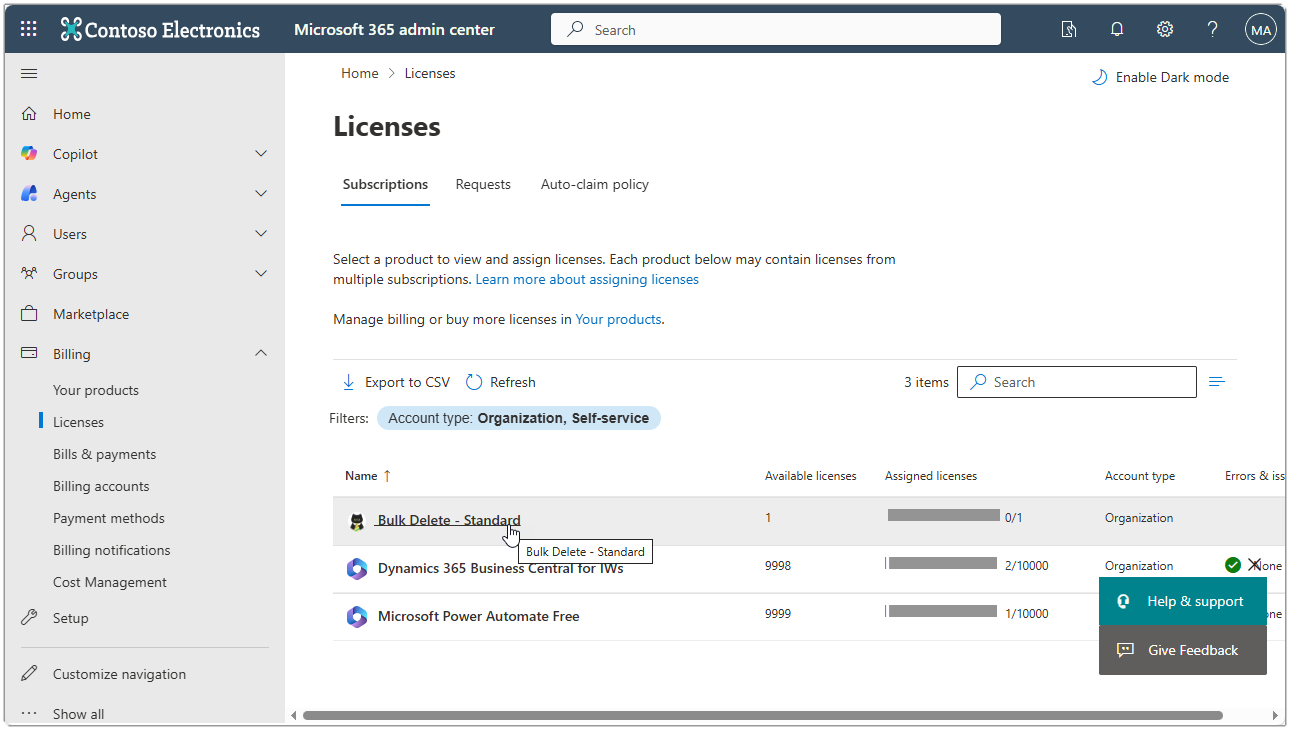
Click on the Name field for the Bulk Delete - Standard license.
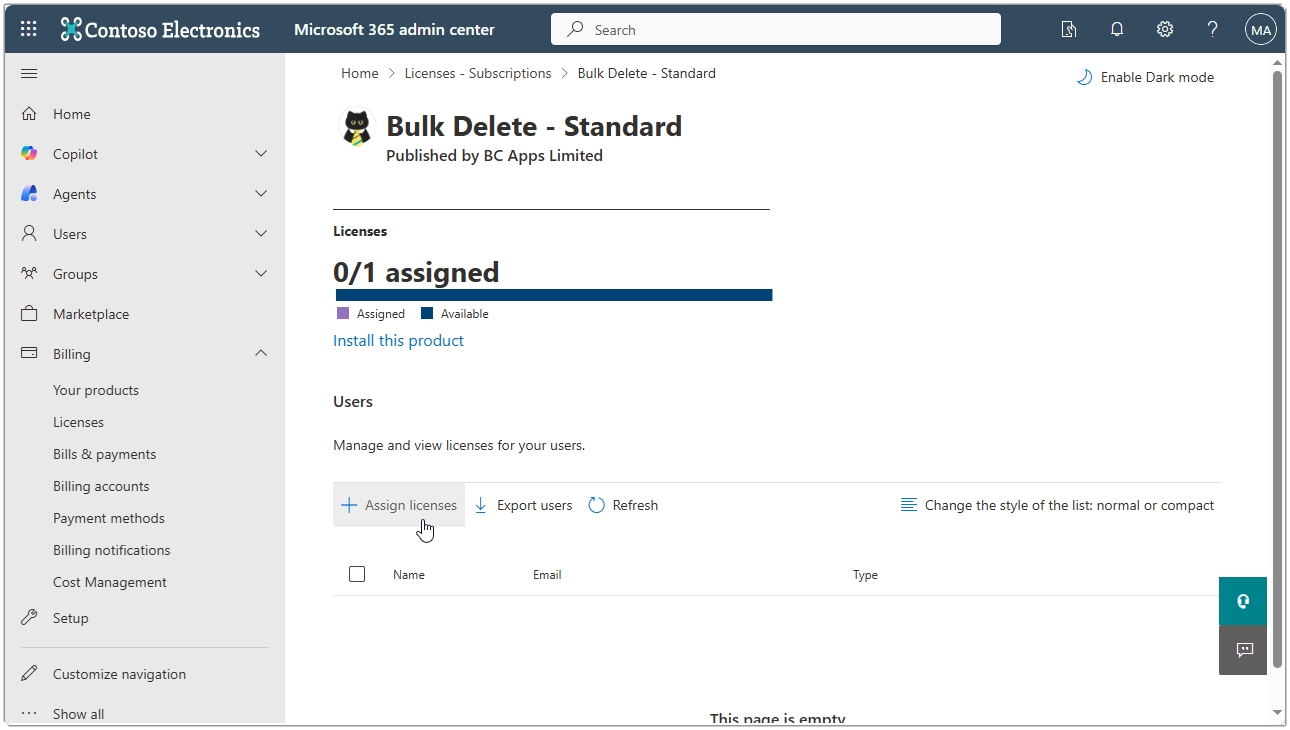
Click on the Assign licenses button.
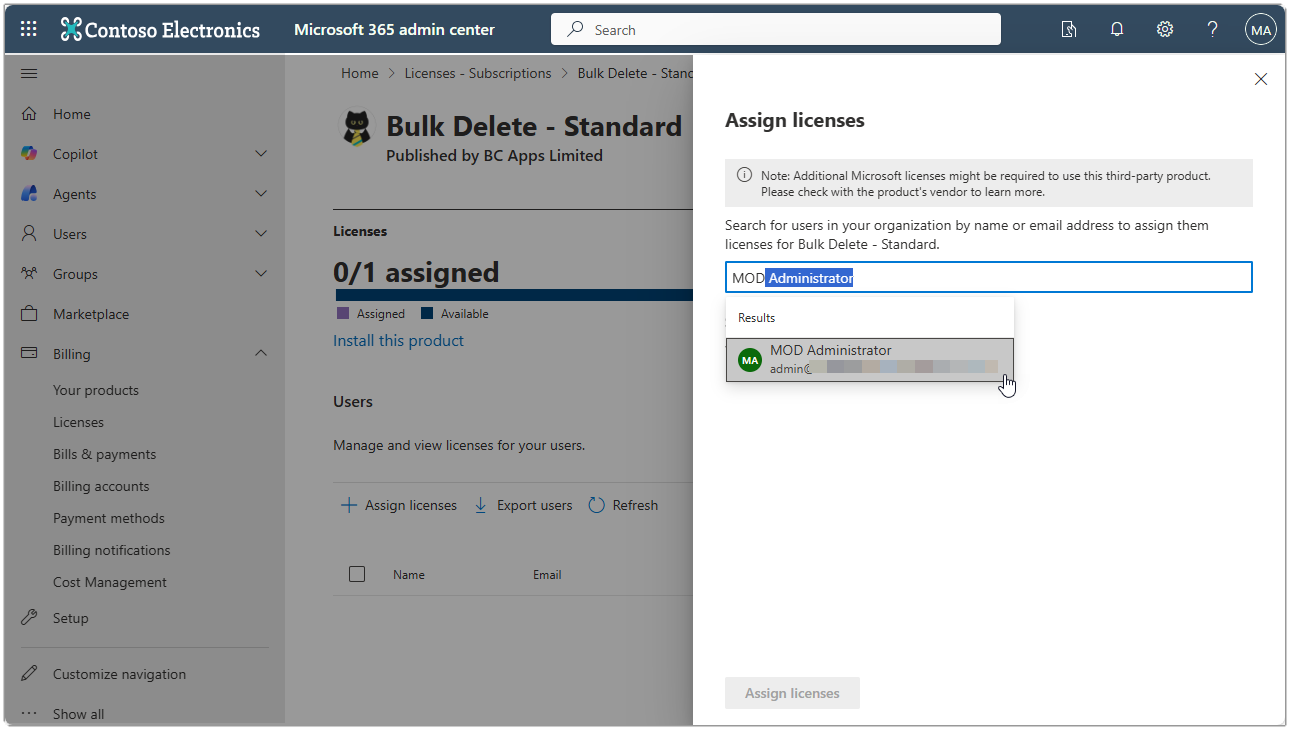
Search for the user name you with to assign the license to and click the user from the Results drop down.
With the user selected, click the Assign licenses button to continue.
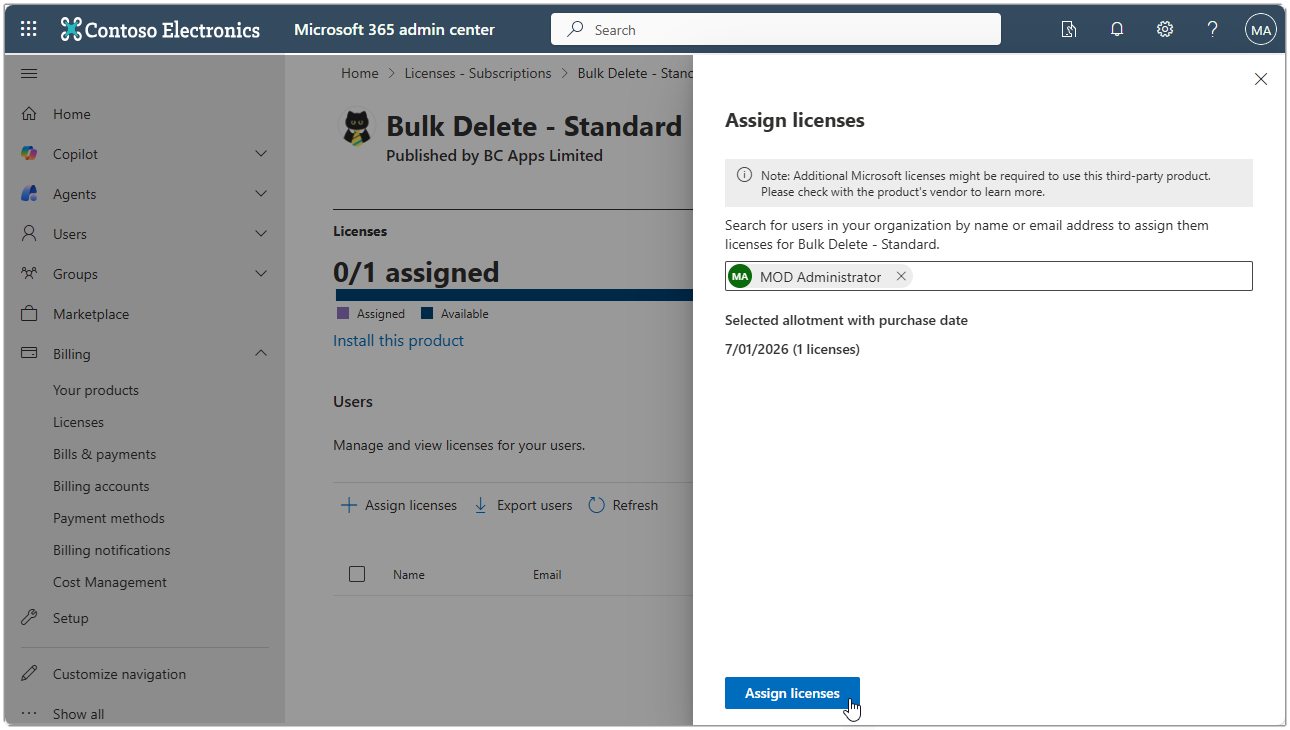
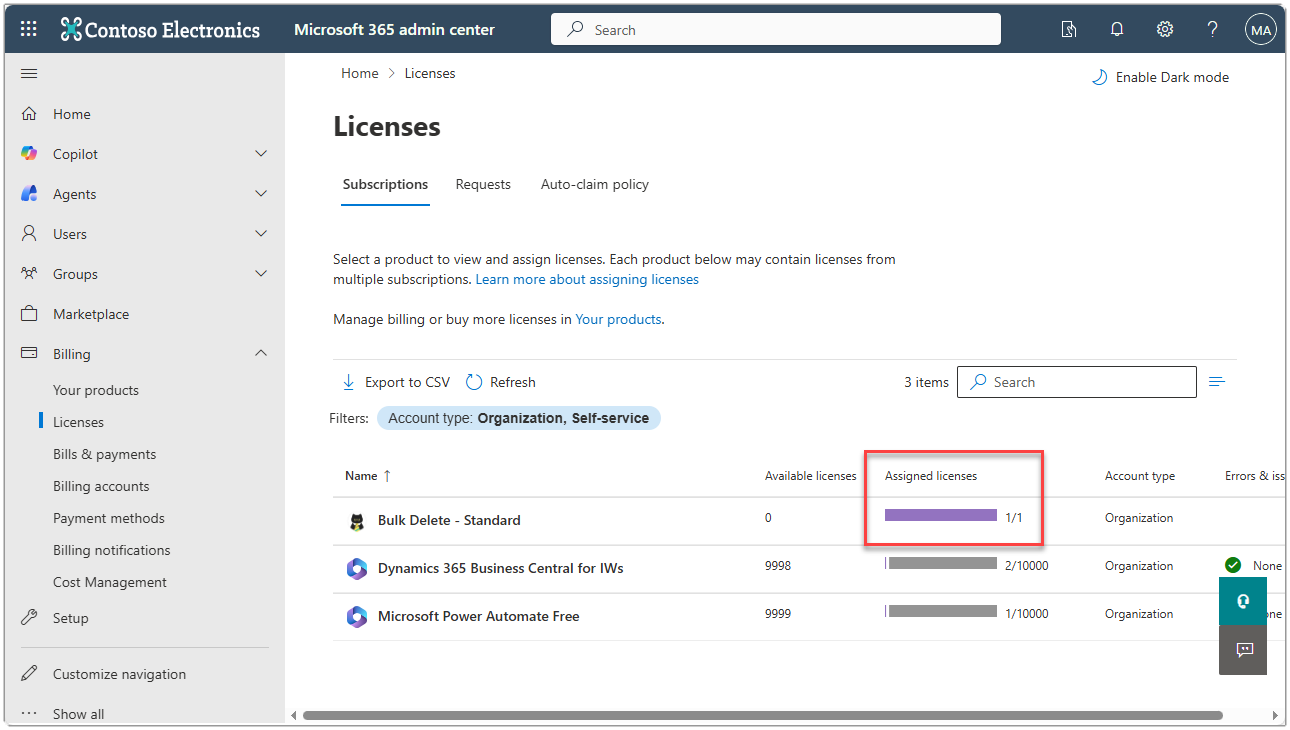
You should see a message showing that the license has been successfully assigned. You can check by going back to the Licenses page and you should see that Assigned licenses now shows 1/1.
Congratulations! You have now assigned a license to your user. Thank you for your support.
Assign Additional Licenses
If you want to purchase additional licenses, you can do so by going to the Microsoft 365 admin center and under Billing, select Your products.
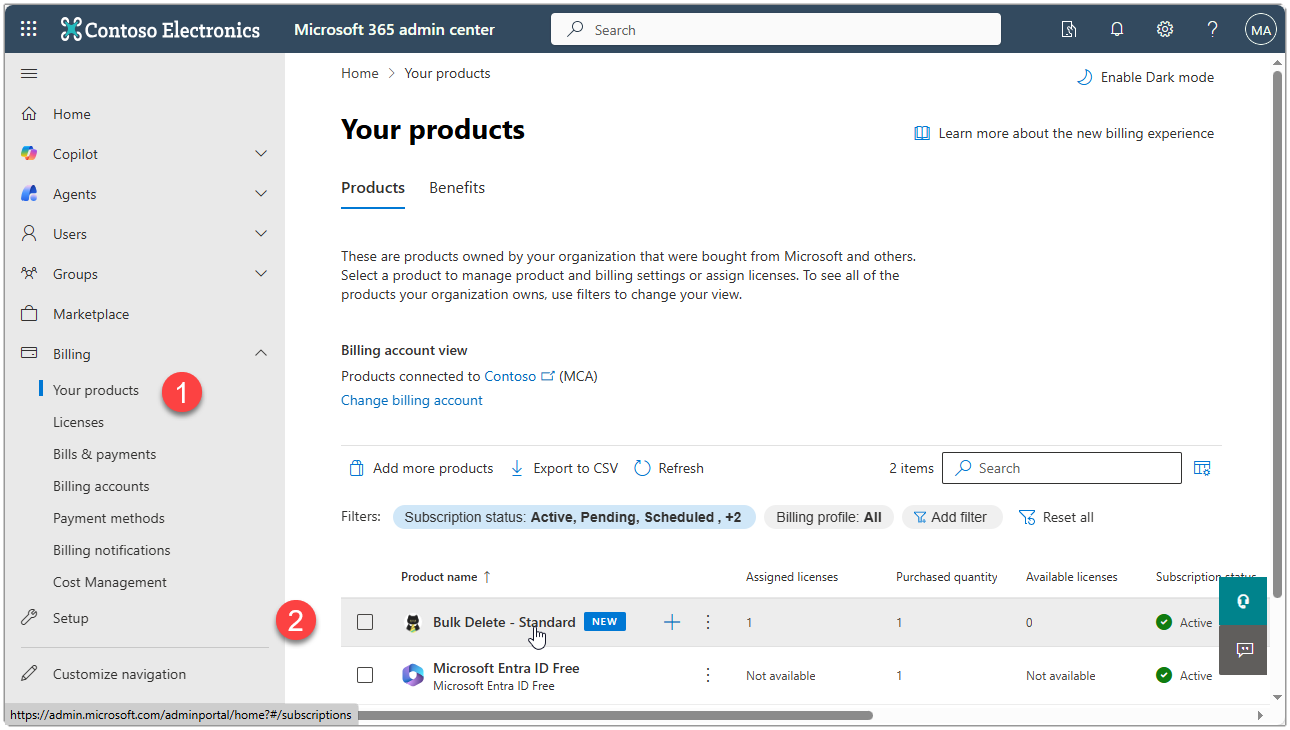
Click on the Bulk Delete - Standard link and you will see the product page for this license.
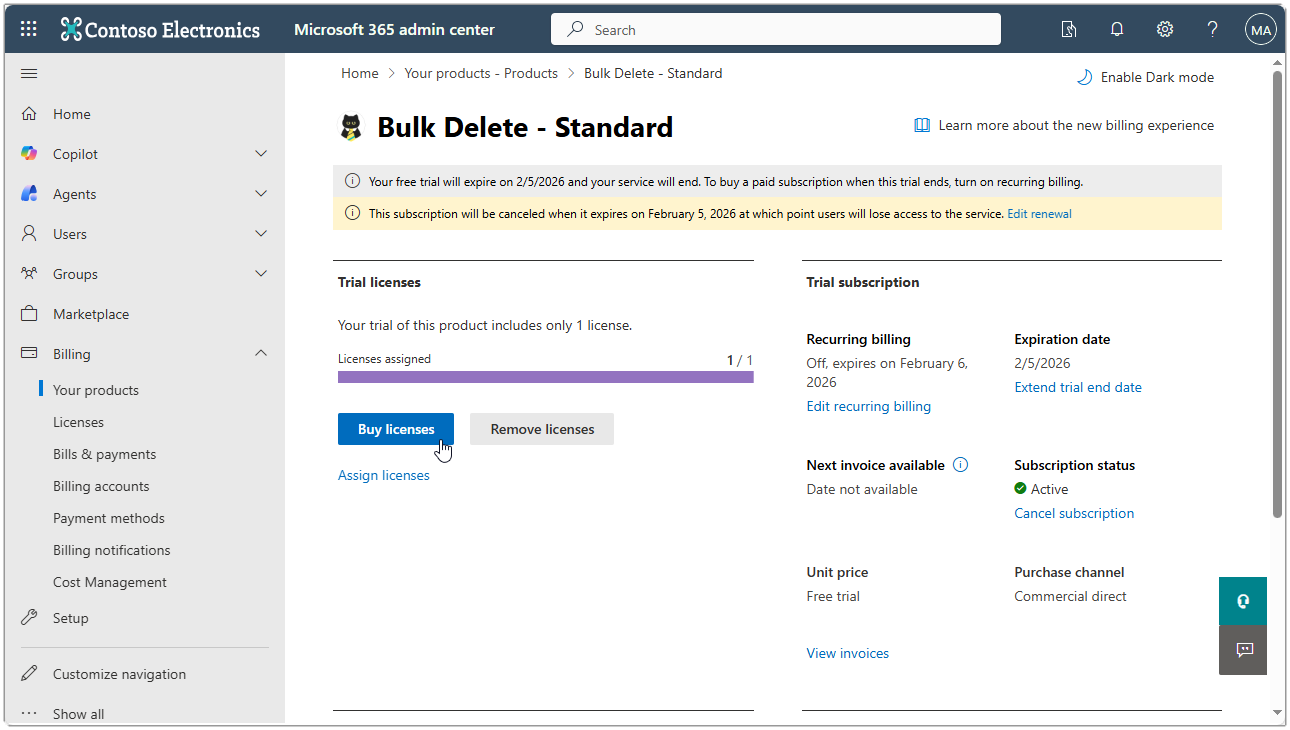
Use the Buy licenses button to purchase additional licenses.
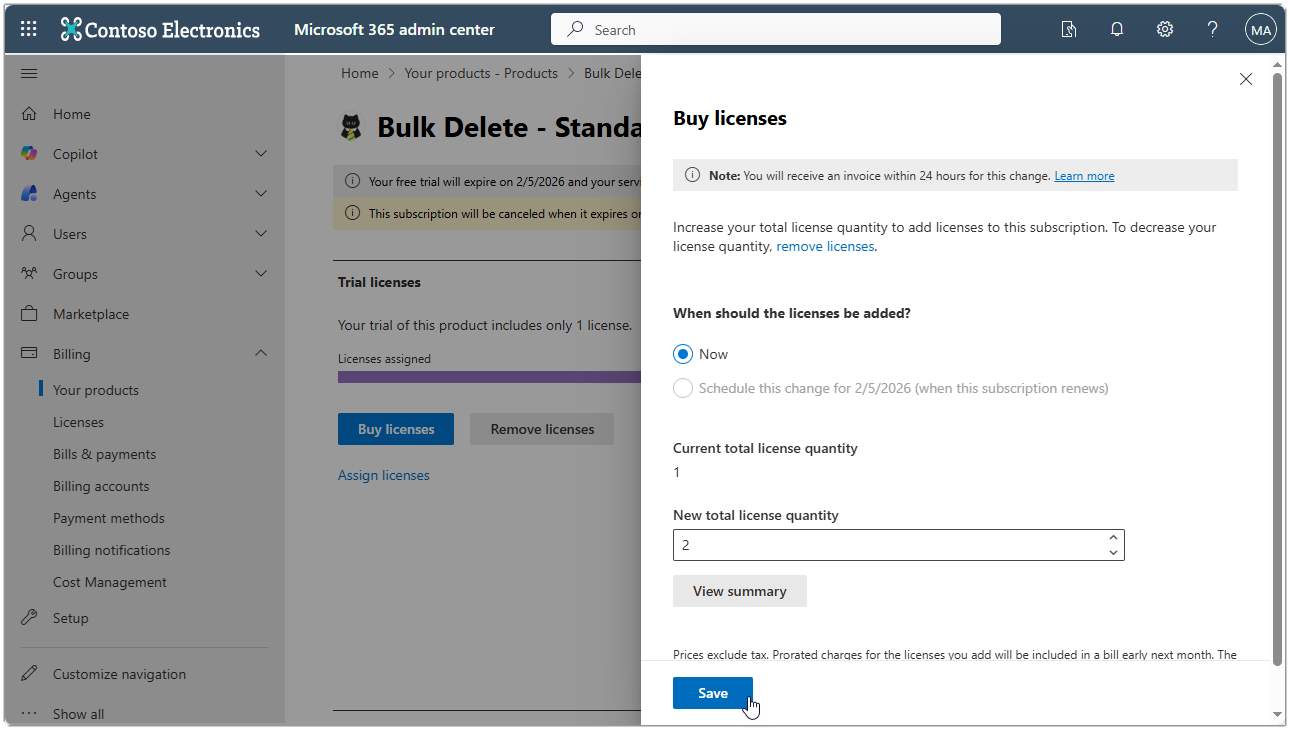
Increase the total number of licenses to the new required amount and select Save. Once the license is purchased, assign it to the user as previously described.
Configuration
Grant Permissions
The licenses provide entitlements to objects within the application but not permissions. A regular user that wants to use the free functionality does not need any additional permissions assigning. A licensed user will have additional rights to be able to process delete packages either in foreground or as a job queue entry. These users will need additional permissions. If you have the SUPER role then you will be able to use the delete packages without additional permissions, otherwise you should assign the BC_BD_ALL permission set which includes all rights for all objects within the extension.
That’s all there is to it. For more details on how you can use the Bulk Delete extension, see the Usage Scenarios help topic.