Street As Setup (Clever Stuff)
Some of the fields on the Street As Setup are a little more advanced than picking the country code for New Zealand. Here’s an explanation of those fields and what they do.
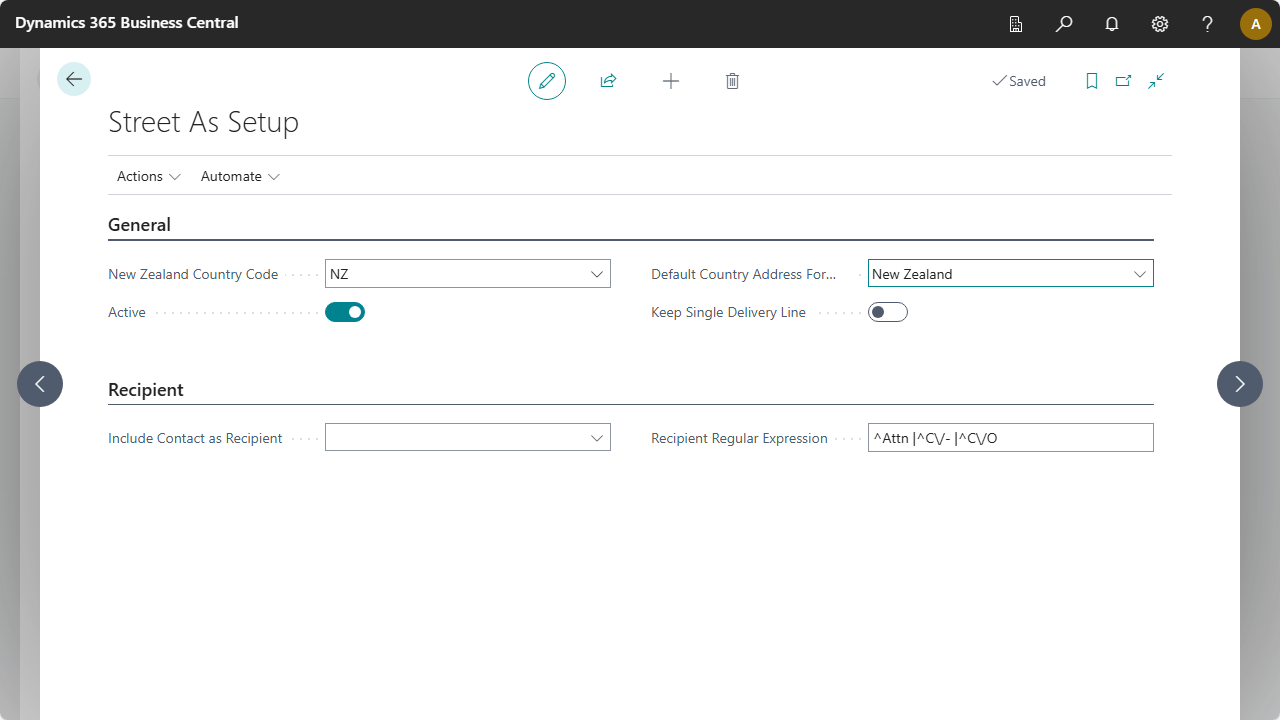
Keep Single Delivery Line
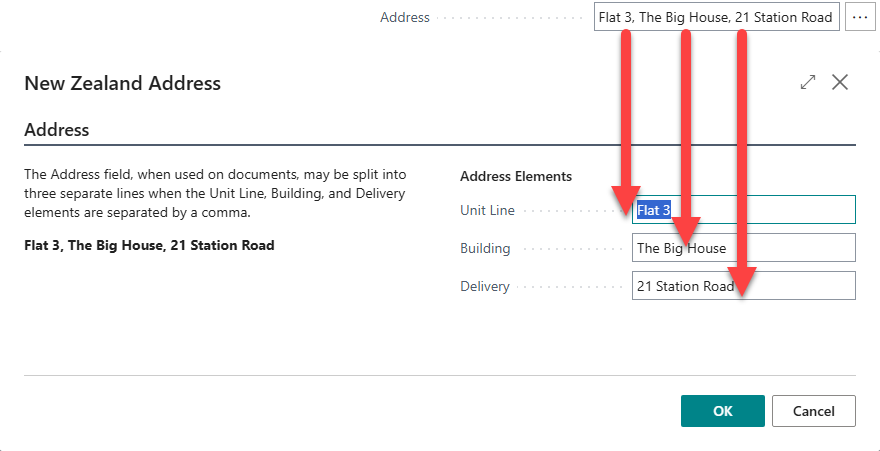
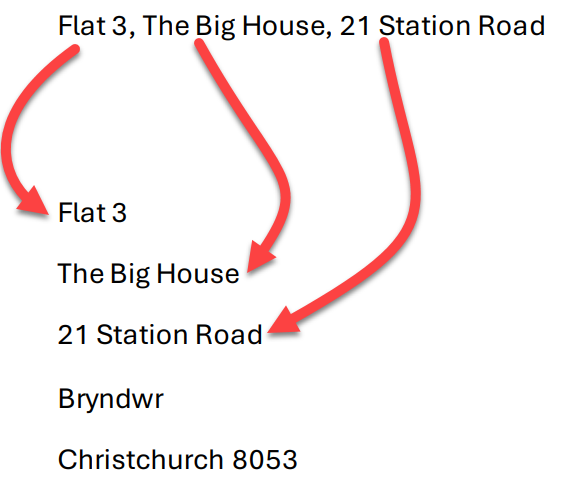
An address line for a New Zealand address can comprise a Unit Line, Building, and Delivery. These values are all entered in to the single Address field and are separated by a comma. When the address is formatted for printing, the default behaviour is to split the three fields into separate lines.
You can use the assist edit (shown as an ellipses) beside the Address field to call up the New Zealand Address card that can be used to help editing the address field.
If you would like to keep the Address field as it was entered with commas and all, tick this box to set a new default behaviour. It is possible to override this setting for individual reports using the Address Format Callers list page.
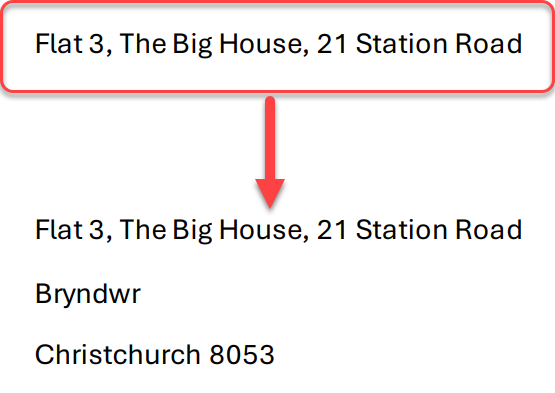
Depending on how this setting is set, the address will be formatted accordingly when printed. The following two images illustrate how the printed address will be shown depending on the setting of Keep Single Delivery Line.
Keep Single Delivery Line = On
Keep Single Delivery Line = Off
Note
Some reports will not have enough room to take a fully split out address line. It is possible to override this setting on a report-by-report basis.
Include Contact as Recipient
This field specifies whether the contact should be included as the recipient in the formatted address. The options are applied to all printed address, although this setting can be overridden on individual reports using the Address Format Callers list page. The option for Include Contact has the following possible values and meanings:
| Value | Meaning |
|---|---|
| Never | The recipient line for New Zealand addresses will never be included. |
| Always | The recipient line for New Zealand addresses will always be included. |
| Only When Matches Regular Expression | The recipient line for New Zealand addresses will only be included when it matches the regular expression that is defined in the Recipient Regular Expression field. |
Recipient Regular Expression
This field value is used in conjunction with the Only When Matches Regular Expression setting on the Include Contact as Recipient field. Regular expressions are an incredibly powerful way to specify a formula for matching to some text. The default setting for this field is ^Attn |^C\/- |^C\/O and you can restore this default value by using the action on this page and selecting Actions > Set Default Recipient Regular Expression. For more information on using regular expressions and some examples of how this default regular expression works, take a look at this Regular Expressions 101 Saved Example.
Regular ExpressionsThe previous link will take you to the regex101.com site with a saved example that shows how the default regular expression will match against the following list of candidates.
- Bond, James Bond
- Attn Miss Moneypenny
- C/- Mr Bill Tanner
- C/O Ms Mary Goodnight
The behaviour of the recipient line on the address can also be overridden on a report-by-report basis.
Address Format Callers
Every time an address is formatted for printing, the object and routine that called that address formatting code will get logged in this page. This means if you haven’t run any of the reports that format addresses as part of their output after installing the Street As app, this list will be blank. The list will build up over time as each of the various reports get used.
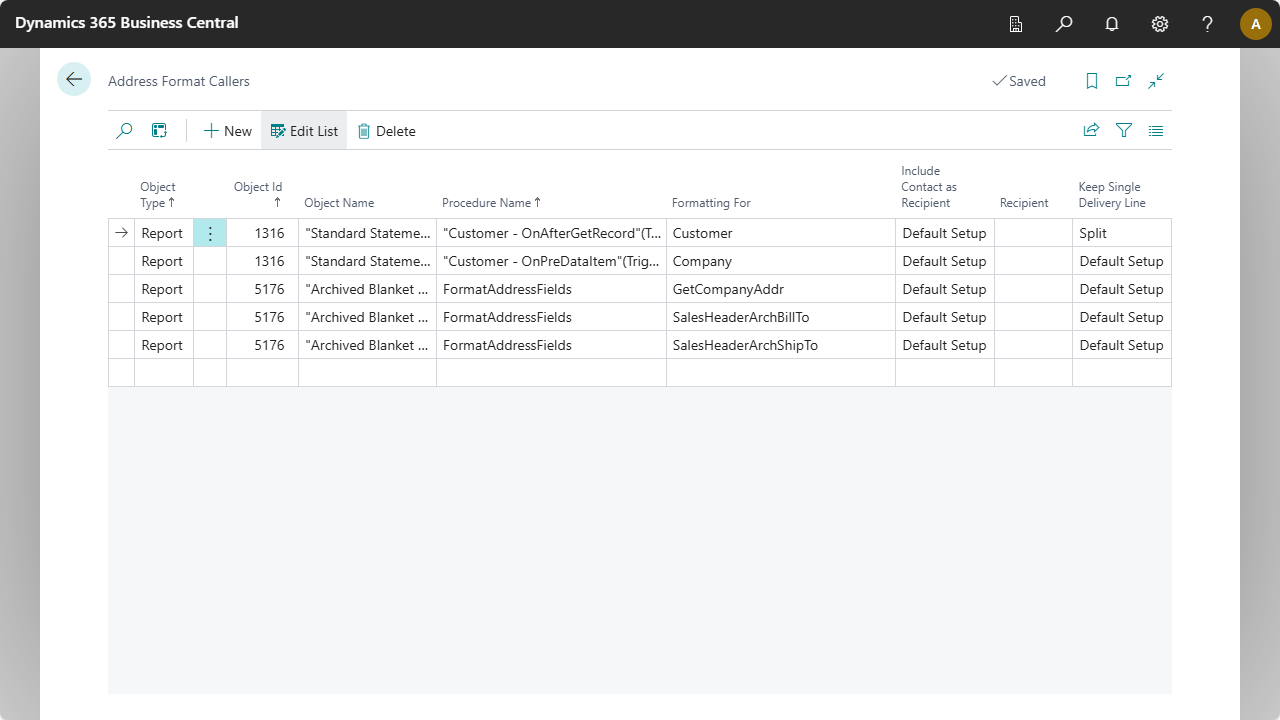
Some of the reports have multiple formatted addresses on the single report and, in order to make this configuration work for any caller (of which there are many), I needed to make it refer to technical things like Object Type and Object Id. I also included the Procedure Name and Formatting For to allow different settings to be configured for each individual address that may appear on the report. It’s unfortunate that this has to appear so complicated but, it can be extremely useful if you want to have slightly different layouts on some specific reports.
To illustrate how the set up is used, here’s an example of some values and how they relate to out-of-the-box report layouts. Note that each of the rows shown here have:
- Object Type = Report
- Object Id = 1304
- Object Name = “Standard Sales - Quote”
- Procedure Name = “Header - OnAfterGetRecord”(Trigger)
I have removed those columns from the sample to conserve space.
| Formatting For | Notes |
|---|---|
| GetCompanyAddr | Your company’s address in Company Information. |
| SalesHeaderBillTo | The bill-to address from the Sales Quote. |
| SalesHeaderShipTo | The ship-to address from the Sales Quote. |
Top Tip If you're not 100% sure which of the addresses on the printed report corresponds to which of the Formatting For values, you can use the settings of the contact to identify which address is which. For example:
| Formatting For | Include Contact as Recipient | Recipient |
|---|---|---|
| GetCompanyAddr | Use Specified | COMPANY ADDRESS |
| SalesHeaderBillTo | Use Specified | BILL TO |
| SalesHeaderShipTo | Use Specified | SHIP TO |
For each of the options in the list you can specify settings that will override the default behaviour specified on the Street As Setup page. The option for Include Contact as Recipient has the following possible values and meanings:
| Value | Meaning |
|---|---|
| Default Setup | Use whatever settings existing on the Street As Setup to control how the recipient line is displayed. |
| Never | The recipient line for this address will never be included. |
| Always | The recipient line for this address will always be included. |
| Only When Matches RegEx | The recipient line for this address will only be included when it matches the regular expression that is defined on the Street As Setup page. |
| Use Specified | The recipient line always be included for this address and will always show the value specified in the Use Specified field. |
The option for Keep Single Delivery Line has the following possible values and meanings:
| Value | Meaning |
|---|---|
| Default Setup | Use whatever settings existing on the Street As Setup to control whether the delivery line is kept or split. |
| Split | The delivery line for this address will always be split. |
| Keep | The delivery line for this address will always be printed as it was entered, commas and all. |
Setup Suburbs Data
We’ve prepared a demonstration data file with New Zealand suburbs and their respective town or city and postcodes. Use this link to download the NZ Suburbs data file from our Web site. Once the download has completed, save the file to a local directory (such as your Downloads folder). The file will be named Street As NZ Suburbs.json.
With the file downloaded, go to the Street As Setup page and select the Import Suburbs action.
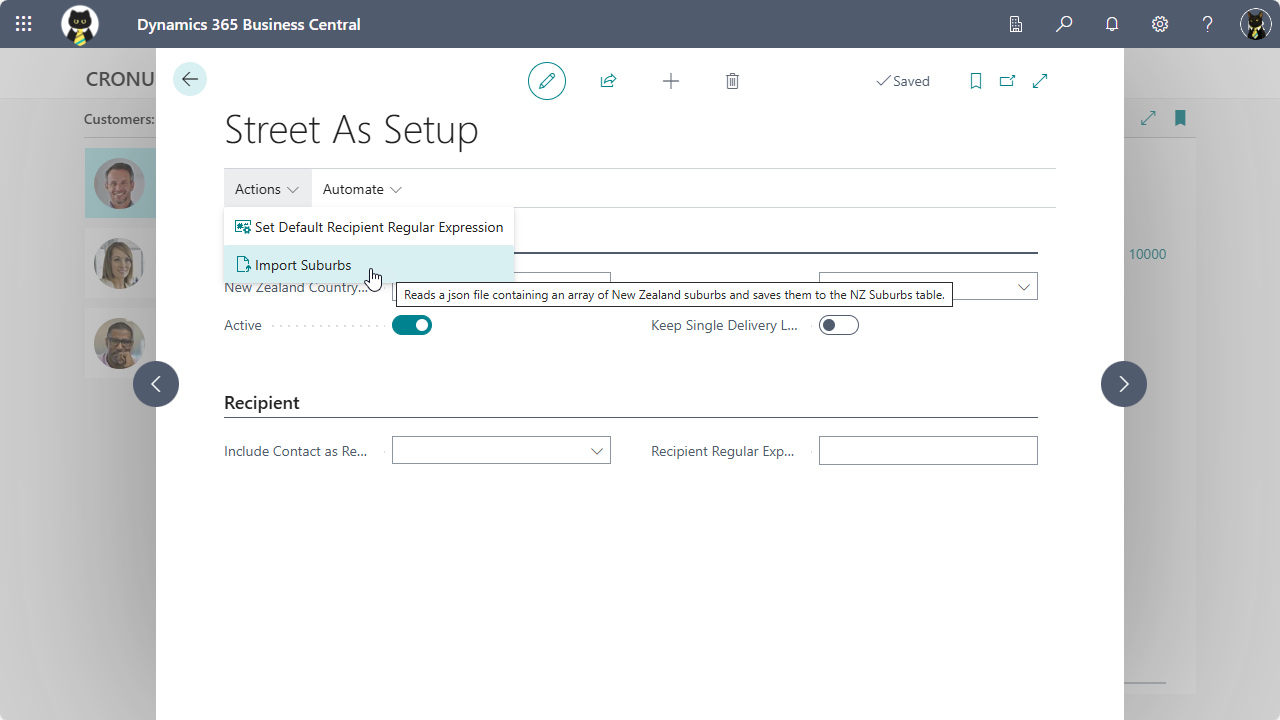
Select the file you downloaded in the previous step. The system will ask if you want to delete existing NZ Suburbs before import. As this is the first time you’re running this option, it doesn’t matter whether you select Yes or No. If you have manually entered suburbs into the setup table and want to keep the manual entries you have made, you should select No. The data will import quickly. You can run the New Zealand Suburbs page to check the imported data.
That’s everything we have in the Street As app. If you want to learn more about New Zealand Addresses, check out the New Zealand Postal Addresses topic. If you enjoy using Street As, please leave a review on the Street As product page on AppSource.